How to print a new label from an old label
Printing Labels that are already made We make labels for many of our products. We also make stickers, they are the same thing.
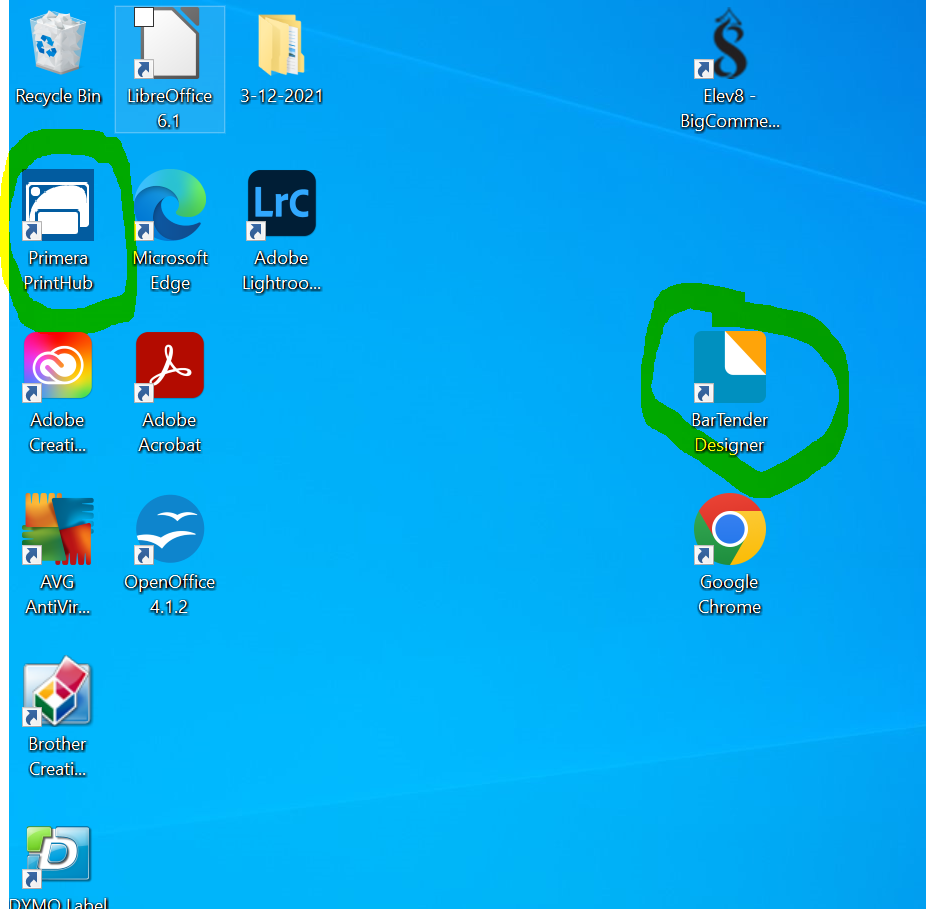
- Open Bartender Designer found on the desktop
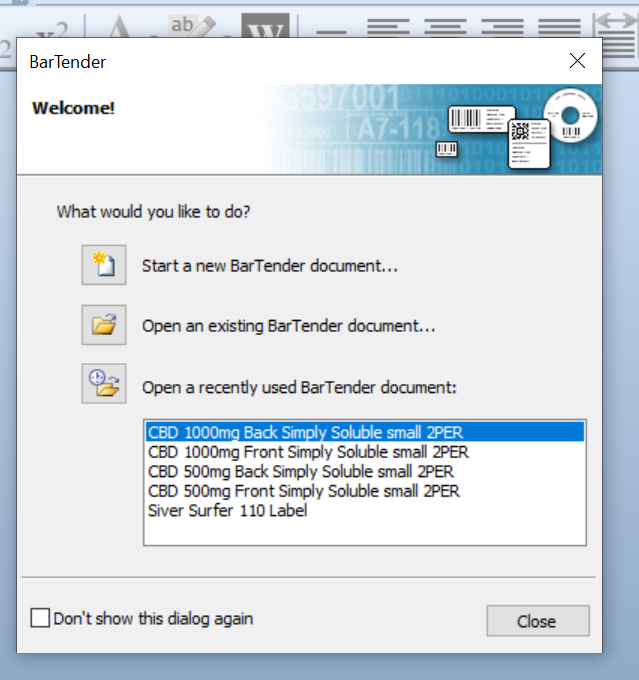
- If you see the file you are printing click on it.
- 2.1 Most always you will click on Open an existing Bar Tender Document
- 2.2 If this is a new file and you know it, you will need to make the image a label here
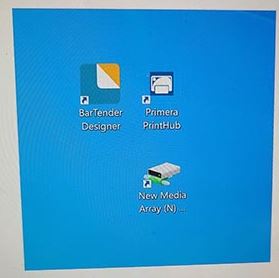
- 2.3 Click on New Media Array, then Elev8 Distribution Products, then Labels For Products, then Labels Ready for print. In this end folder are all label that have been printed before in Bar Tender
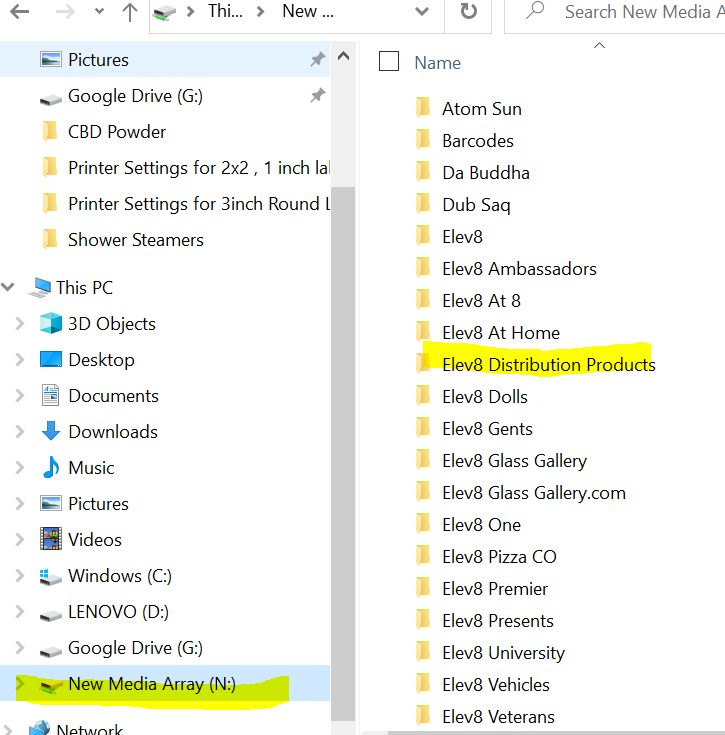
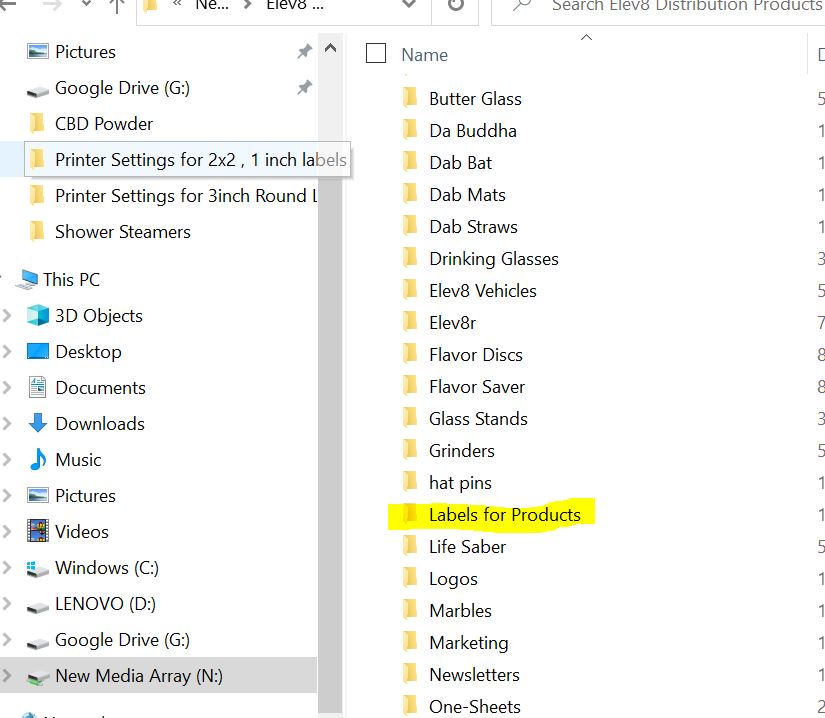
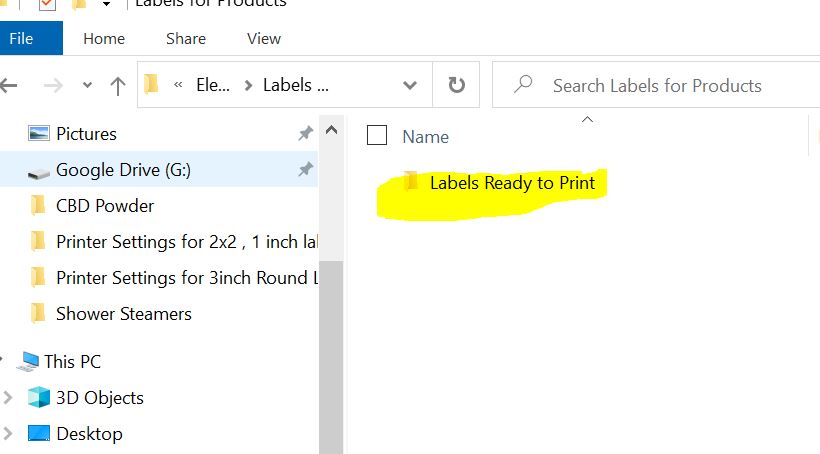
- For this, we will print a Silver Surfer Cord Label
- 3.1 Click on the folder that has the product in it
- 3.2 Click on the product you want to print
- SET UP PROPER LABEL MATERIAL
- 4.1 Open lid of printer and then press unload button
- 4.2 Pull stickers out the back end
- 4.3 Remove spindle of stickers with green part and blue part. the green part has electrical parts in it
- 4.4 Find the proper labels you are printing.
- 4.5 Set the metal marker to 1/2 the width of the label you are printing
- 4.6 If they are 4 inches wide you will be setting the metal marker at 2 inches
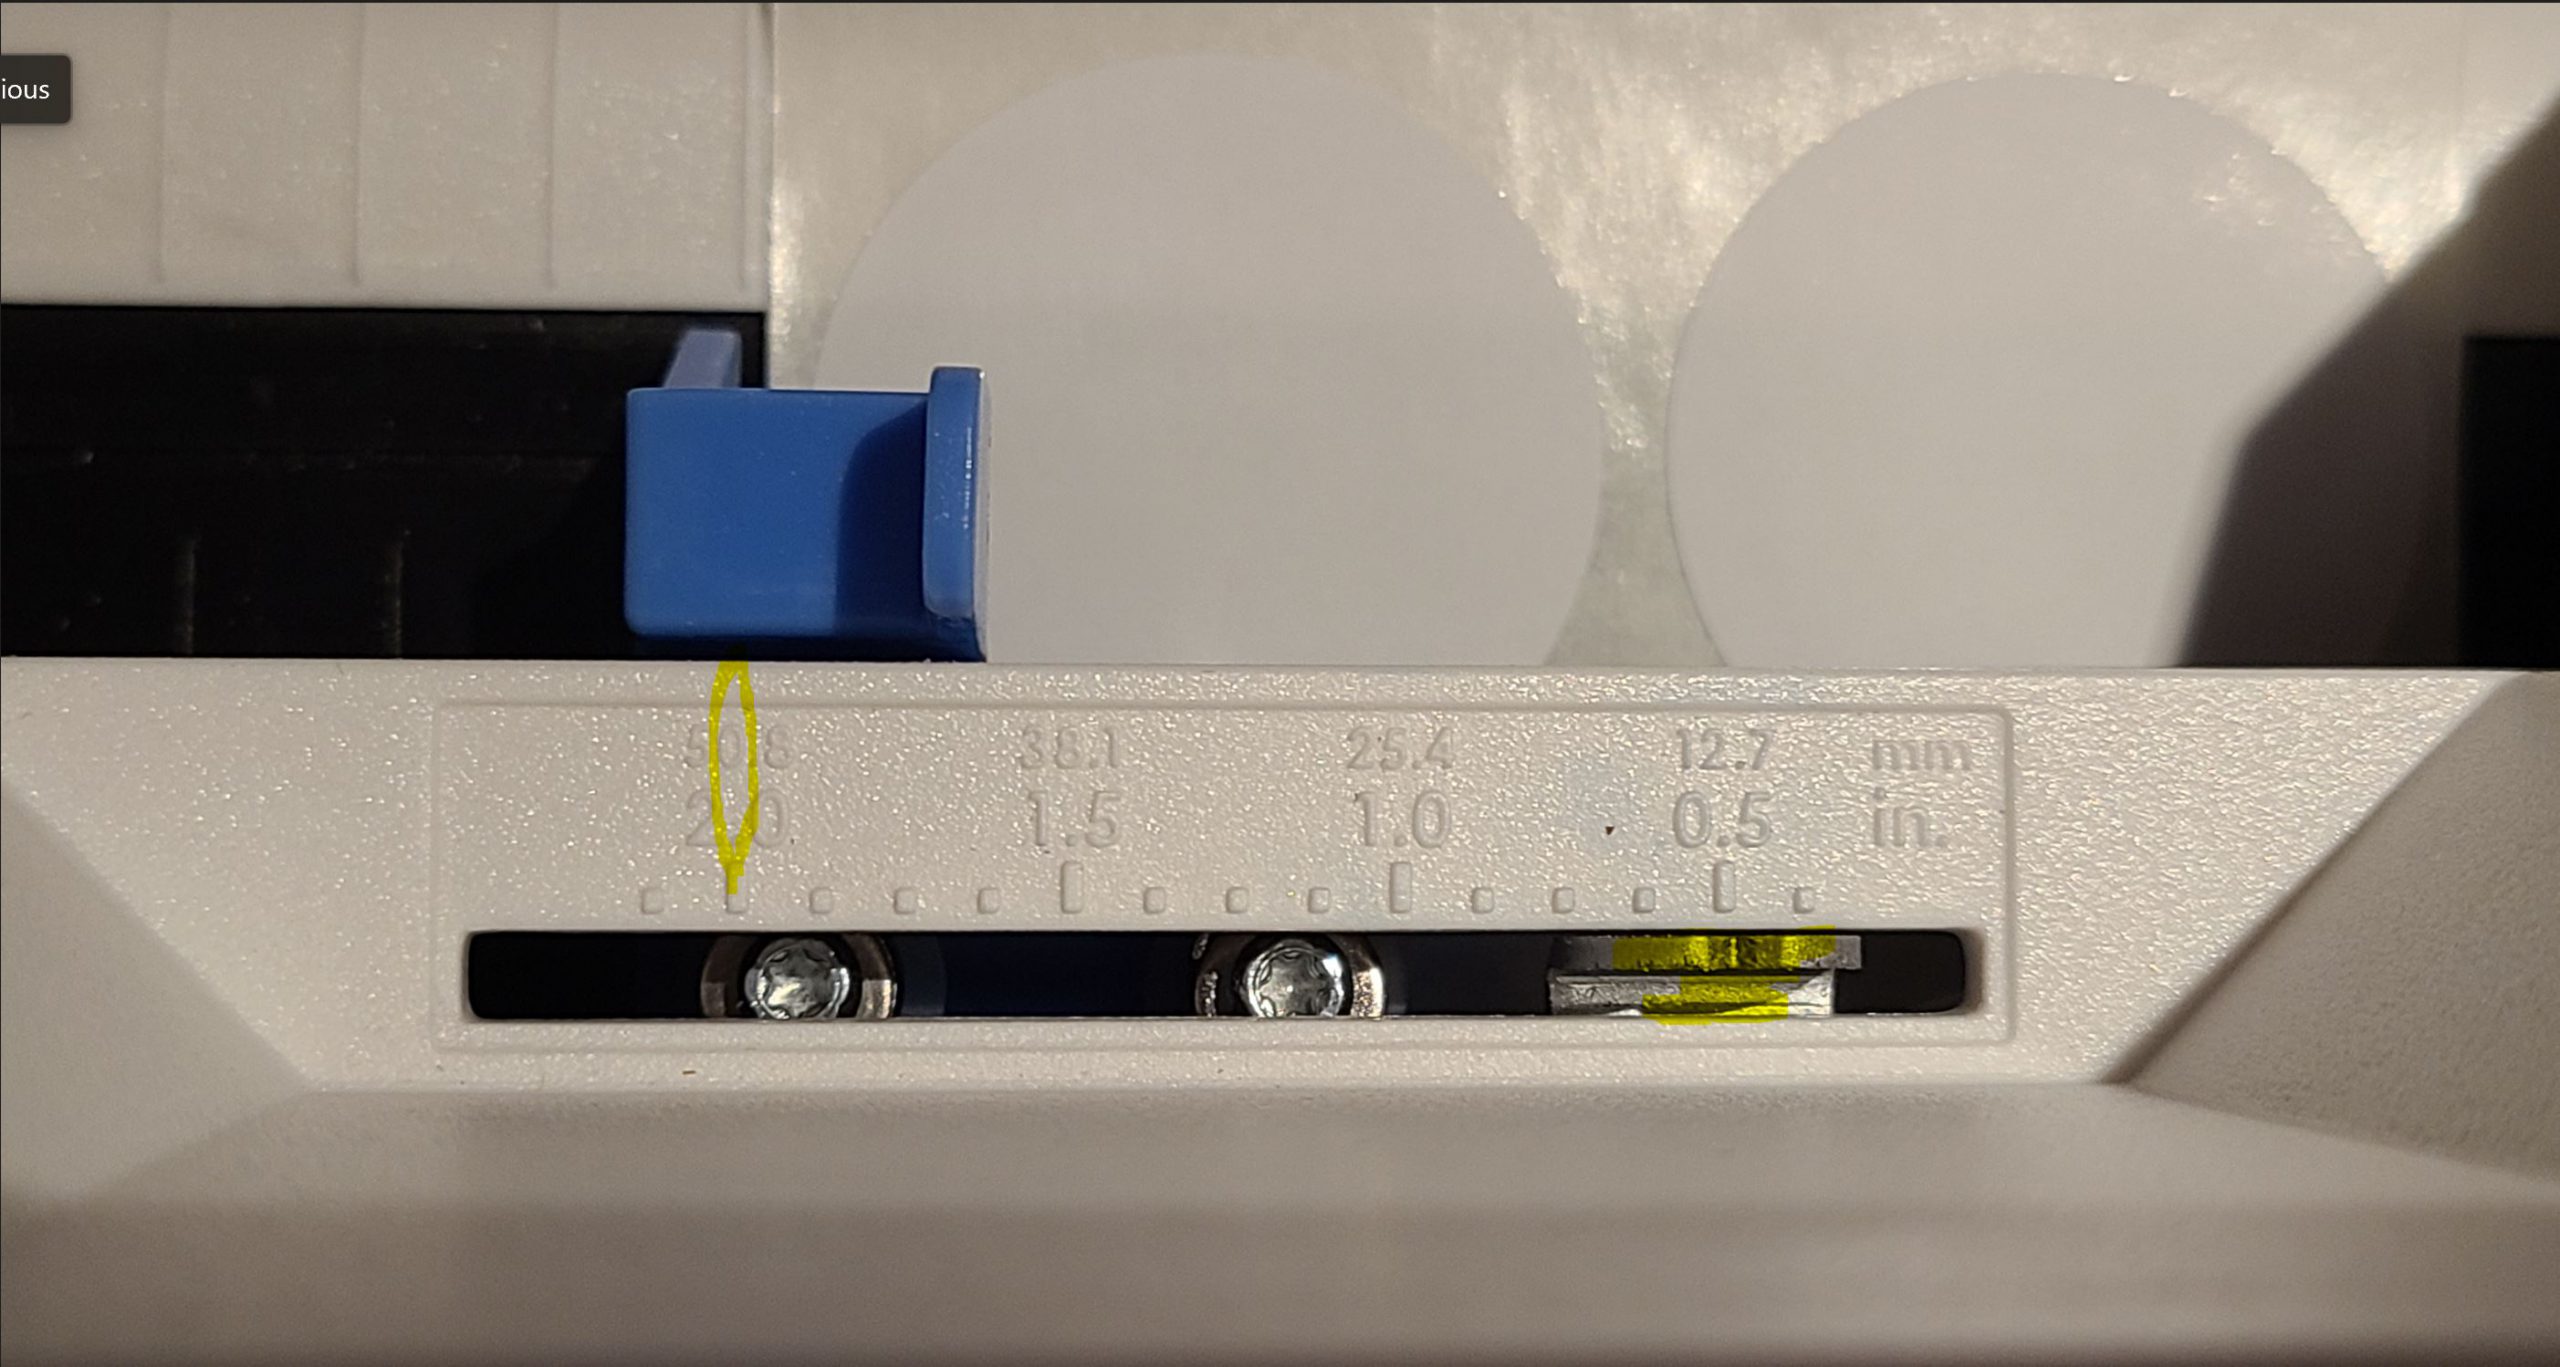
- 4.7 Move the left spindle holder left or right to accommodate the width of the labels
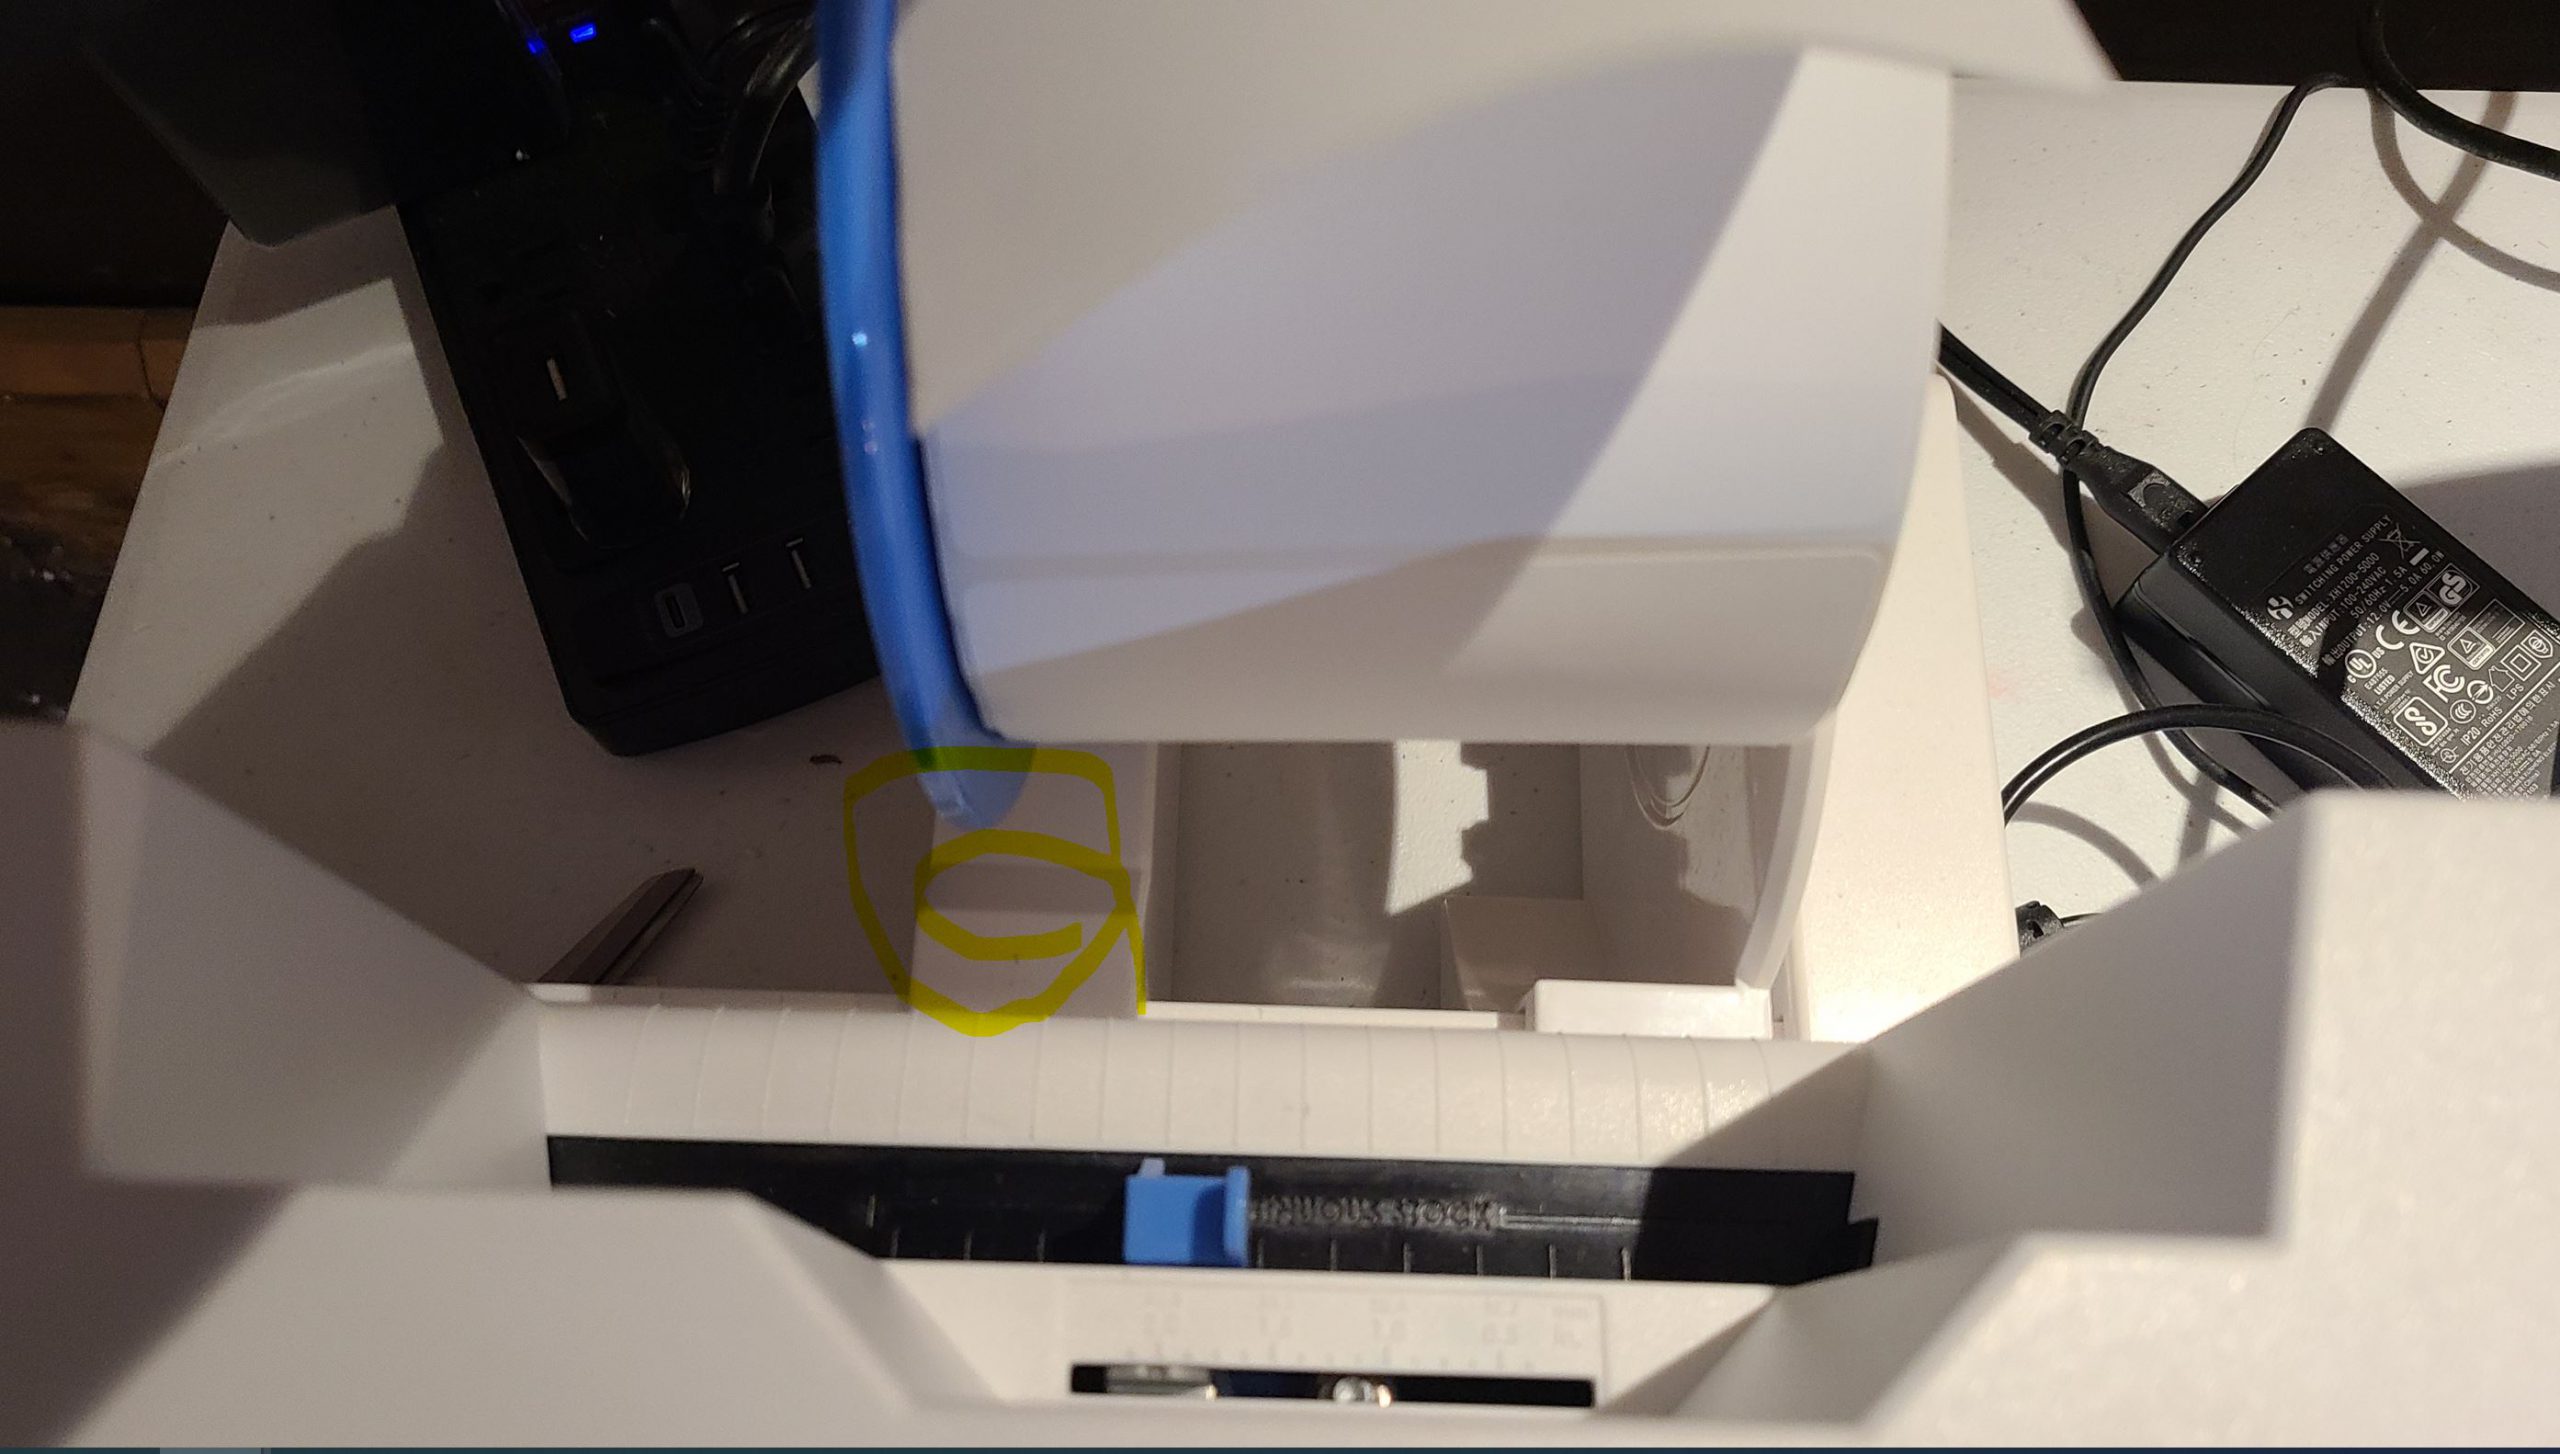
- 4.8 Set the spindle in and make sure the green part goes in with the narrow point down
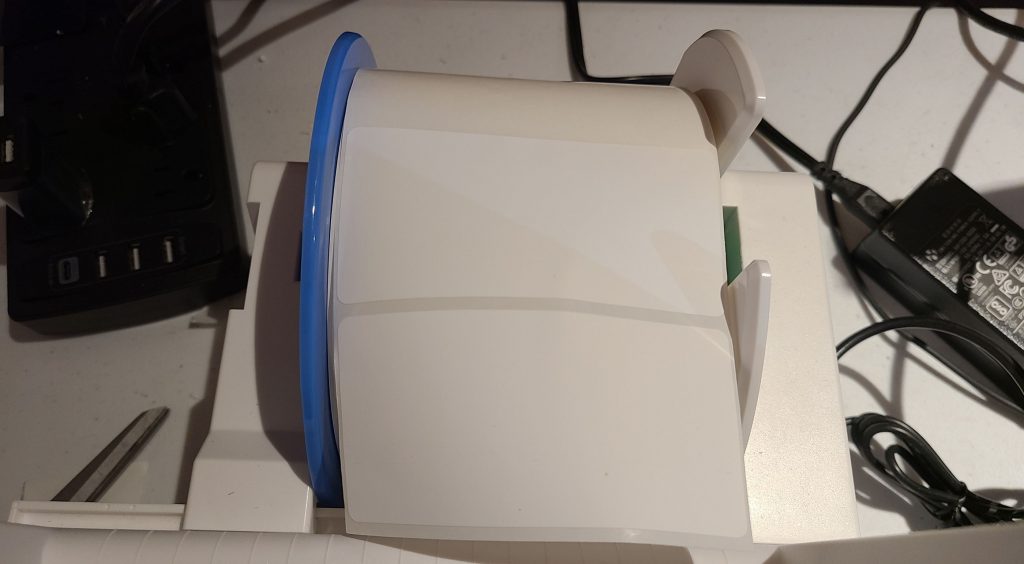
- Move the blue part of the printer to the edge of the label
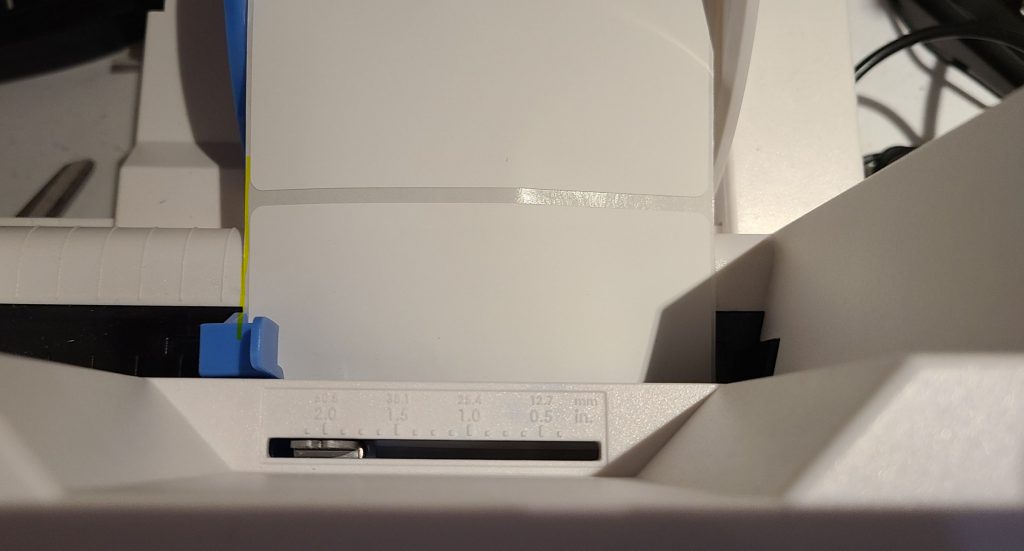
- Press the label into the back and it will suck in. The label needs to be flat and clean to not get caught and suck in smoothly. Push lightly but do not force and the printer will suck it in. **Make sure that when it starts it has some loose label to be sucked in
- Open Premier Print Hub
- 7.1 Click on the Program Premier Print Hub located next to BarTender software on the Desktop.
- Open the folder that is appropriate to the stickers label size you are using.
- Set Print Alignment to setting from folder in Premier Print Hub to match the picture and Print Alignment. You can hover over the folder to see the full file name. You will open the folder and then open the image that says print alignment settings
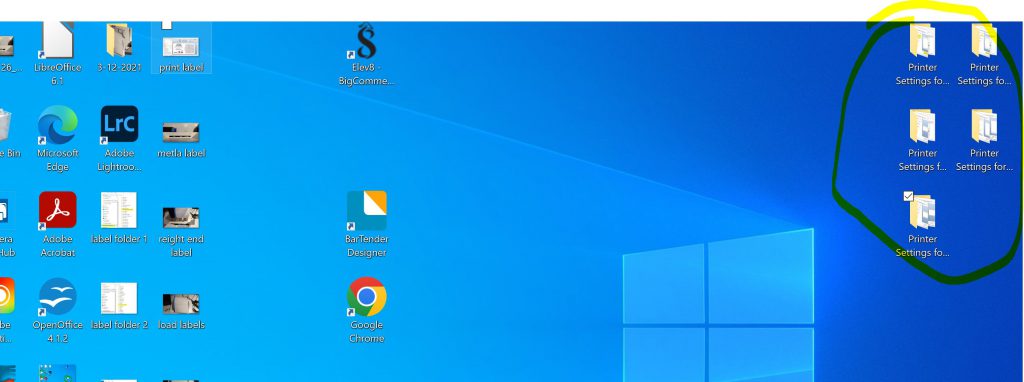
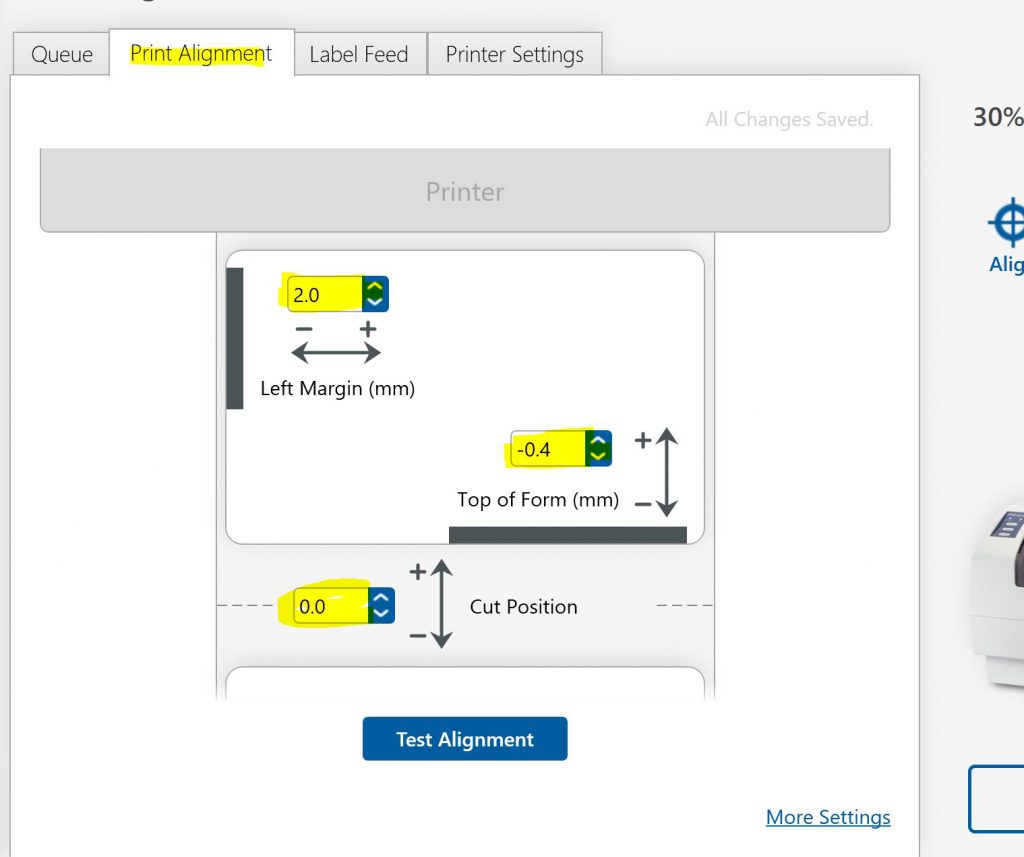
- Go back to Bar Tender and Click Print start out with 1 to always test
- 8.1 Make sure you are printing to the proper Prermiera 600 printer.
- 8.2 Bartender will say the picture is clipped, click continue, this is ok
- Check the label, if off, you will need to make changes in Premiera Print Hub
- 9.1 Print as many as you need
If you get gap sensing error
- Open the top and close it and start again, make sure to feed the label back in
Making a new label to print
- Open an existing label that is the same kind
- Click on the image and press delete
- Click on the image button and then insert from the File
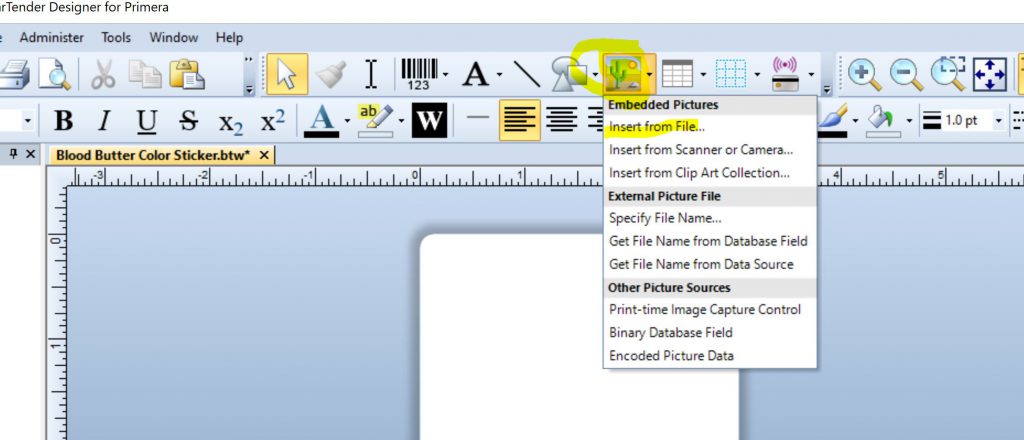
- Go to the location of the image and add it in the center
- You will need to adjust the image to the way the image was you deleted
- To adjust only grab from the corner.
- To rotate grab the blue dot at the top and move. When t gets to 90 degrees it will click into place.
- Finish getting the image to the right size of the orignal
- You can press CTrL + the mouse wheel to zoom in and out
- Once the image is done in place, you need to SAVE AS the file
- Save the file as the name of the product, fully
- Save in the folder LABLES READY TO PRINT, and the proper folder for what the product label is
- Go to step 4
Elev8 Production Jobs
Daily tasks to stay ahead and deliver the best product quickly.
- Take a look at the inventory for all prebuilt vapes.
- Setting up new tubes to keep the rotation moving and fully stocked
- Full welding
- Lighting
- Cording
- Knobing
- Mix weld (as it needs to sit) and use with other production tasks
- Take inventory for all glass and put in orders
- Wands
- Knobs
- Heater Covers
- Look at stock for Ballers
- Look at stock for all kits
- Build orders as needed
- Update stock as needed for all vaporizer production parts
- Take care of all repairs, trade-ins and other tasks associated to this process
- Take care of any production work that is outside of standard production to keep things moving and effecient.
- Maintenance
Weekly Tasks To Stay 100%
- Spot check ANY parts that are used in ANY production
- Inventory for Production
- Stock all kits
- Gather any parts that can be done by the head shop and make sure all tools are available.
Building Elev8 Products
Silver Surfer Build
- Building the disc
- How to Tighten Tension Bar and Stand
- Welding the disc in the housing & adding light
- How to properly Mix JB Weld
- Cording the vapes
- How To Expand The Cord Hole For Older Housing
- Testing Dimmers
- Wiring the dimmer and adding powercord
- How to install a dimmer video
- Heater Assembly
- How to make bases
- Adding bases to the vapes
- Adding the heater cover to the SSV
- Welding Knobs
- Testing
- Serializing the Vaporizer
- Changing a serial number for Refurbished Elev8 Veteran Vapes
- Screening Wands
- Bagging
- Making Bags
- Cutting Tubing or Hose for the whip
Wave Rider Silver Surfer Procedures
- Laser Engraving the Surfer
- Wave Rider Series Sublimation Process
- Building the WRS
- Sublimation Supplies
Super Surfer Build
-
- Wiring the Super Surfer
- Adding the knobs
- Drilling out the fan
- Putting together the disc
- Changing Out from 110 to 220 volts
DBV Build
-
- Building the disc
- Welding the disc in the housing
- Adding the light and cord
- Testing Dimmers
- Wiring the dimmer and adding powercord
- Adding bases to the vapes
- Adding the heater cover to the DBV
- Testing
- Serializing the Vaporizer
- Bagging
- Making Bags
SideKick Build
Life Saber Build
Elev8r Build
-
- Full Kit
- Rig Kit
- Making the Elev8R Sick Clip
Building & Laser Engraving Grinders
Printing Labels
- Printing Labels for Products
- Printing QR instruction labels
Putting on Decals
Ordering More Glass Parts
Trunk Build
Stocking Glass For Production
Essential Oil Kit Build
Vape Part Fixes
Baller Series Kit Build
- Baller series kit
- Baller series kit to be sold WITH THE VAPORIZER
Unit Repairs
Repairs
Repairing Orders
Trunk Production
Glass Clamp Tool
Inhouse Production
Bathbomb Procedure
Making Flat Tip Picks
Taking inventory with Elev8.one
All Glass Pathway Production
No, what you are referring to is the grind. This is used to make the joint perfect. In our industry, a slightly imperfect joining might actually be better, so that it can not get stuck.
Most are made by hand, some German joints are made on a machine.
You can use a mold like most production shops and Premier use, or you can just make them by hand
If this happens try to do empty cash hard reload.
Just open the Chrome Dev Tools by pressing F12. Once the chrome dev tools are open, just right click on the refresh button and a menu will drop down. This menu gives you the option of doing a hard refresh, or even clearing the cache and do a hard refresh automatically.
You can always refer to Custom Glass. But we want you to give the customer the best service, and take the money in this store.
- Find out their budget.
- Take their info
- Find out what they are looking for with images that they can refer you too.
- After you have the info you should contact Jeff and see if you can get it done with what you have. If you can not, then you can ask Jeff to call them and help. You will need to make a custom glass card in trello for this.
- Call them and confirm it can be done and collect 1/2 the money up front. When done you can collect the remaining money. This is usually always done Paypal.