
- Open https://192.168.2.45
- Login using the Username: admin, and password that is on the spreadsheet, or ask Steve or Adam to provide you with it.
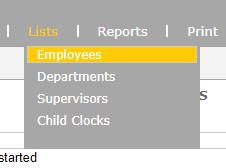
- Once logged in, hover over Lists, and click on Employees.
- Click on Show Inactive.
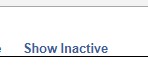
- That will list all previous employees.
- Choose one that is an older employee.
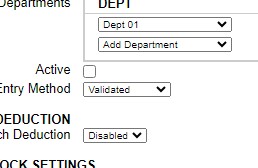
- Make that employee active again, by checking the box next to Active in their profile.
- Click Submit at the bottom of the page.
- Go back to the top of the new screen and hover over the Reports tab, and click on Timecards.
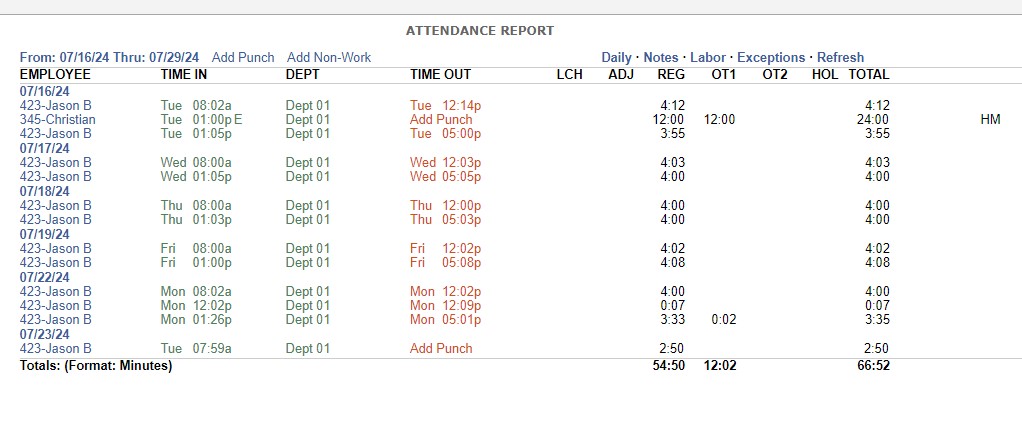
- Click on the time period in the top left, and change the dates from the current month and year to 2010, leave the end date to the current month and year.
- Change the employee to the inactive one you just made active, click Submit.
- If no punches come up, perfect the previous time data has already been archived.
- If there is punches for the employee download those in a report and store that in the personal drive.
- Go back to Lists and Employees.
- Now that we have an employee with no punches on their profile, you can start to modify it for the new employee.
- Book keeping should have provided you with all the information needed to input them into the system.
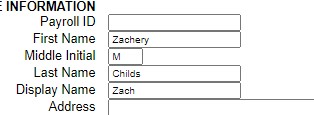
- Modify the First Name, Last name and Display name field, (Display name could just be their preferred first name if they have one besides their given first name)
- The next Section employee settings, the only field we need to modify is the PIN/Badges, that will be what they use to punch in and out, general practice is to use the last 4 digits of their social security number.
- The rest of the settings do not need to be modified.
- Click Submit on the bottom of the page, and have the new employee attempt to punch in with the newly created credentials.
How to Access Time Clock for Payroll
For Atom-Sun (6331 Production) open http://192.168.2.45
For Elev8 Premier (Glass Studio) Open http://192.168.1.44
For Higher Elevation (Hemp) open http://96.66.83.134:9844
For Elev8 Downtown (Elev8) open http://50.189.38.34:9844/
- Login with the username: admin the password is in the spreadsheet or ask Steve or Adam for it.
- Once logged in go tot the top bar and hover over Reports, a drop down menu will give you additional options.

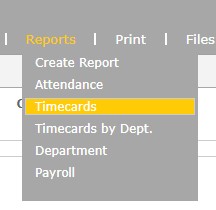
- If you are looking to pull time cards for employees, click on Timecards.
- You will be presented with the Timecards for the current pay period.
How to download recorded calls
- Go to https://192.168.2.9
- Click on FreePBX Administration.
- Login with the username recording, the password is in the spreadsheet, request it from Steve or Adam.

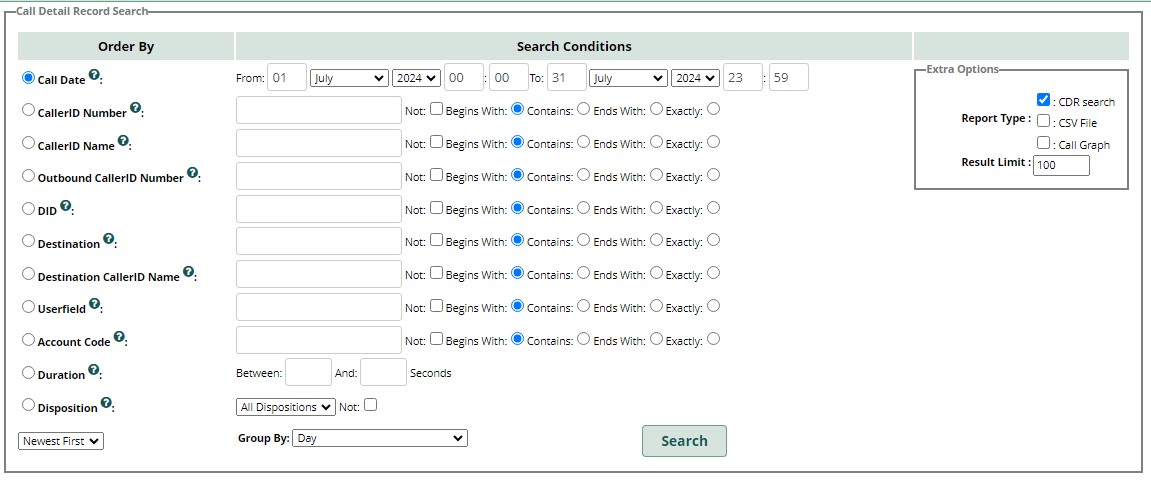
- Once logged in click in the top bar for CDR Report.

- Depending on what information you have to find the call you are able to search by date or phone number received from. Make sure to check the Radio button to the left of the method you are searching for the call. If you are searching by a date range make sure to raise the Result Limit as well.
- Once the call is located.
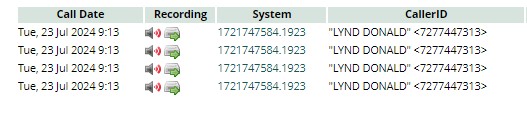
- Click on the speaker to confirm which is the recording you would like to download.
- Once confirmed click on the icon of the Box with a Right facing Arrow icon.
- Call recording will be in your downloads.
Building an Elev8 Box
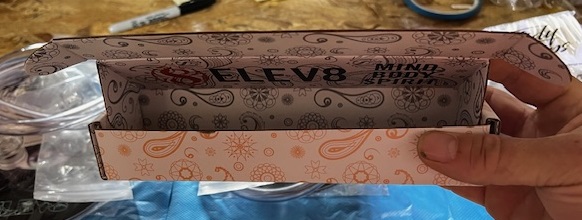
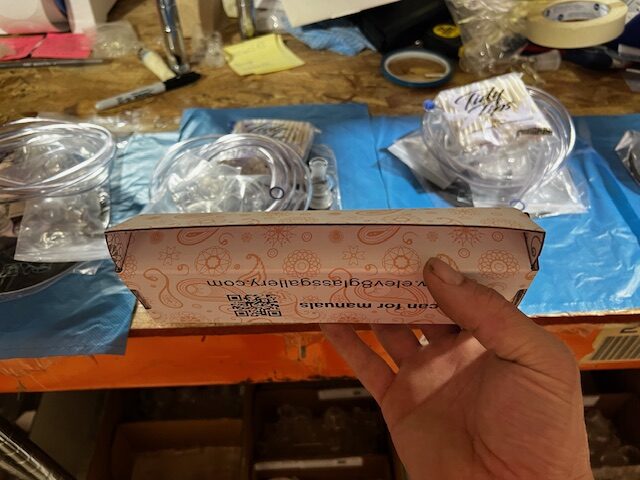
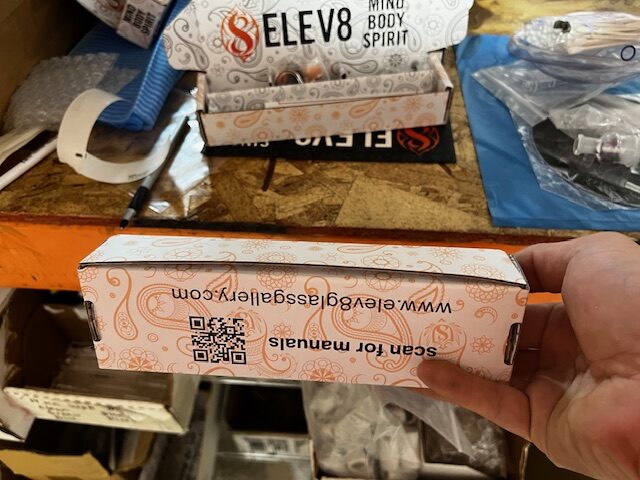
Elev8 Boxes have an inside and an outside.
- Start with body of the box flat on the table with the White and Black Design up, and Elev8 Logo and design readable on the top.

- Remove the two punched hole fillers. One on each side.

- Grasp and fold the front flap vertical.

- Repeat with the rear lid and flap.

- Bend in the tabs on the front and rear flaps.

- Bend bottom left and right flab all the way until the tabs engage the slots in the bottom of the body and hold the tabs.

- Repeat on the other end.

- To complete the box bend in the tabs on the lid so that they fit into the main box cavity.
- Take remaining tabs and slot them into the ends previously assembled.
- Push flap tight to the rest of the box.
- Install sleeve over inner box.

- Push sleeve to flush with the ends of the inner box.

Refunds for Guaranteed Shipping Services
When UPS or FedEx makes a guarantee on shipping time for their delivery, they stand behind those with money back guarantees.
For FedEx the Guaranteed services are the following:
- FedEx Priority Overnight
- FedEx Standard Overnight
- FedEx 2Day® A.M.
Do note this does not include standard 2Day anymore.
For UPS the Guaranteed services are the following:
- UPS 2 Day Air A.M
- UPS Next Day Air
- UPS Next Day Air Saver
- UPS Next Day Air® Early
Do note this does not include standard 2Day anymore.
First claims for FedEx, for UPS Claims Process
To file a guaranteed service claim for FedEx, you must log in using the FedEx billing login, if you do not have that, contact Steve or Adam to get it.
**FedEx will only allow you to file a claim for late deliveries after the shipment has been invoiced in the billing system.**
Go to the FedEx Billing System
- Once logged in click on LOG IN TO FEDEX EXPRES & FEDEX GROUND

- This will open a new tab.
- Click on Search for* drop down box and click on Tracking ID
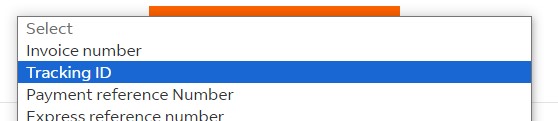
- Enter the Tracking number from the shipment
- Click search.
- If the tracking number has been invoiced already it will pop up with a result.
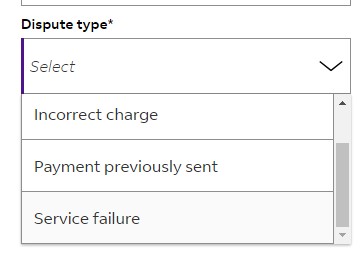
- Click near the bottom for DISPUTE SHIPMENT

- The shipping cost will auto populate in the top field.
- Click the Dispute Type* drop down to select Service Failure.
- Fill in the rest of the details regarding the late shipment.
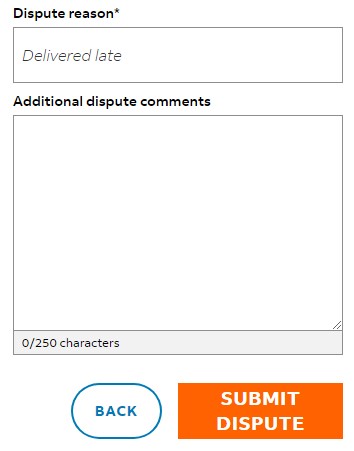
- Once those are complete click SUBMIT DISPUTE.
For UPS Guaranteed Service Claims.
- Open the following link UPS from ShipStation Form
- Fill in the top section information as normal for a damaged or lost package claim
- The email address the account is under is steve@7thfloorvapes.com
- Company Name is Elev8 Distribution.
- Email address or Fax can be the email that you check to see when the claim has been updated.
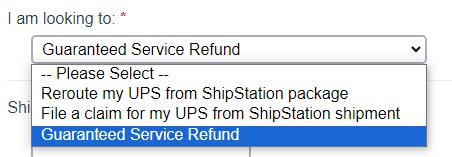
- When you get to the “I am looking to:” dropdown, instead of choosing File a Claim for my UPS from ShipStation Shipment, choose Guaranteed Service Refund.
- Now the form will ask for the Tracking number.
- Choose the service level that the package was shipped. **Noting the list above, if the class of service isn’t listed, it is not guaranteed.”
- For Drop Off Location: the warehouse address, unless it was dropped off at UPS.
- Click Next.
- Confirm the Affidavit of agreement.
- Complete the Clail
Protected: Filing a FedEx Lost Package or Damage Claim
What do I do if the Internet is not functioning?
If the internet is not working, the first thing to test is see if a computer on a wired ethernet connection is experiencing the same issue.
If the computers on the ethernet connection are fine, than it is most likely just a WiFi issue.
Steps to resolve WiFi issues
If the internet is down here are the steps to see what is going on.
- Go up to the server closet and look at the DSL Modem.
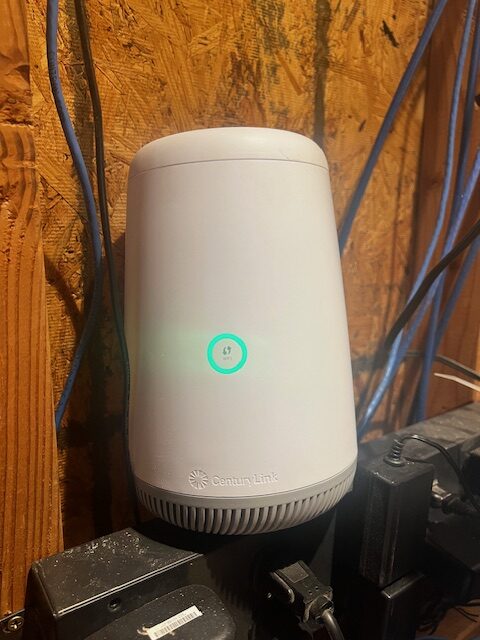
- If the ring is Green, that means that it is able to communicate with the internet, so the issue is somewhere between the modem and the workstation.
- If the ring is Blue or Flashing Blue, the modem is still trying to synchronize with the connection.
- If the ring is Red, there is an issue with the connection, contact CenturyLink Support (1-800-244-1111 Opt. 4)
- If the ring remains Blue Flashing for an extended period of time, power cycle the modem by removing the power cord and leaving it disconnected for 5 to 10 seconds, and then re-plug the power in.
- Once the modem comes back up, if it turns green the internet should be back to normal, test on a machine has a wired ethernet connection to the internet.
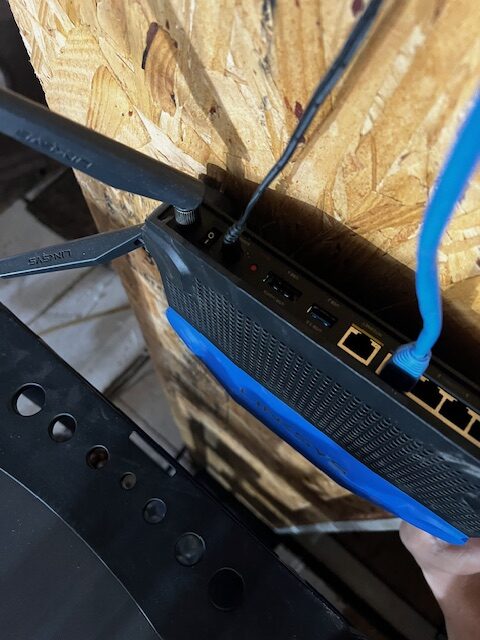
- If the ring was green to start with and computers aren’t able to connect to the internet, the next step is to look at the Router. (the Silver Box in the middle)
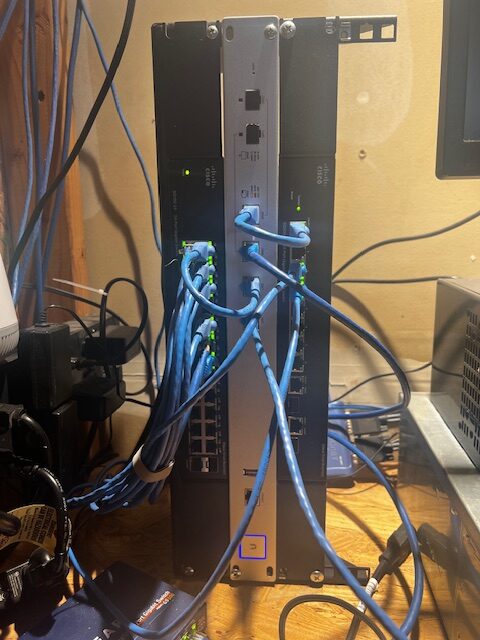
- Look at the light around the U icon near the bottom, if that is not illuminated or is a White Light, or a Flashing White Light, that means that the device is either off, booting up or not in a normal operational state.
- If the light is flashing White wait for it to go to solid blue, at which point test again on a computer on the wired ethernet network.
- If this does not solve the problem the next place to look is the Black box to the left of the silver box.
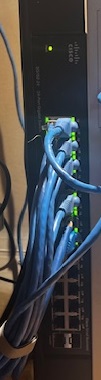
- If there is a green light and the ports are flashing green, there is activity flowing through the Switch, look to the top right cable from the Router to the Switch and confirm there is activity on that port.
- If that is present, confirm if the effected workstation has internet again.
- If the internet is still not working contact Steve or Adam.
If there is an issue with the WiFi there are a couple of steps to resolve that.
- See which WiFi account you are connected to, if Premier is what you are seeing for the network name, you are not connected to the optimal network for the 6331 side, switch over to the 7thfloor or 7thfloor_5ghz.
- If you are connected to 7thfloor or 7thfloor_5ghz, the WiFI access point may need to be power cycled.
- Go upstairs next to the filming area on the wall outside of the Server closet is the WiFi Access point, it is a Black and Blue device attached to the wall.
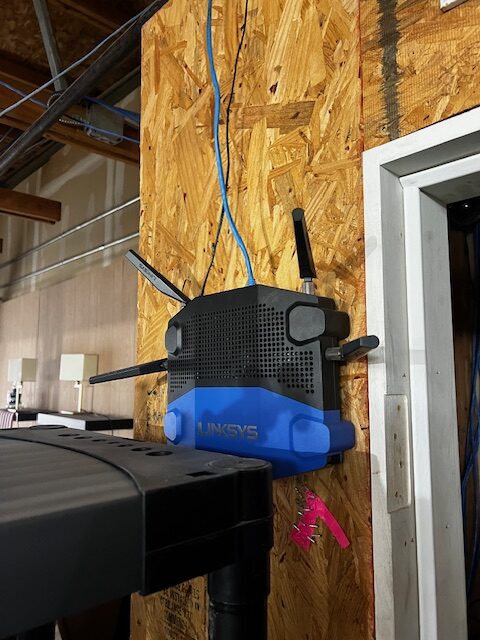
- You will be turning off the access point for a few seconds and turning it back on again, you do not need to disconnect the power, there is a rocker switch on the far left side top of the device.
Filing claims for Packages
There are three different classes of Package Claims.
Lost Packages.
Damaged Packages
Guaranteed Services that did not arrive on time
For lost packages depending on the shipping method there are going to be a different process for each.
Filing claim for USPS Shipping
Filing a Lost Package Claim with Global Post
- search the tracking number with Global Post.
- If the last tracking even is over 2 weeks prior start processing a lost package claim.
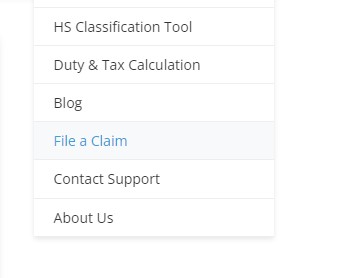
- On the Global Post Tracking Page, go to Resources on the Top Right to the Left of Request a Demo.
- Click on File a Claim in that drop down menu.
- Once in that you will add all specifics about the shipment.
- For the Shippers name put in Steve Kelnhofer
- For the shippers Email put in your email in case they request additional information.
- Select Lost for claim type
- Put in the tracking number from ShipStation, as well as the shipping date (Not the order date)
- Finally the claim amount, this should be the complete invoiced value of the order.
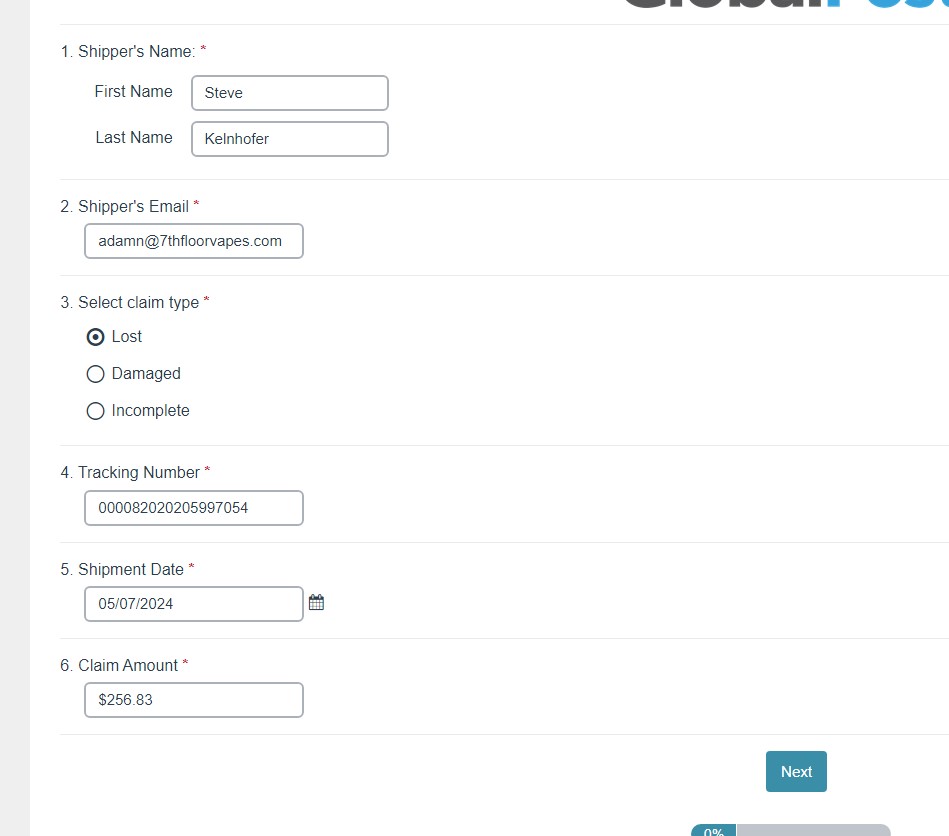
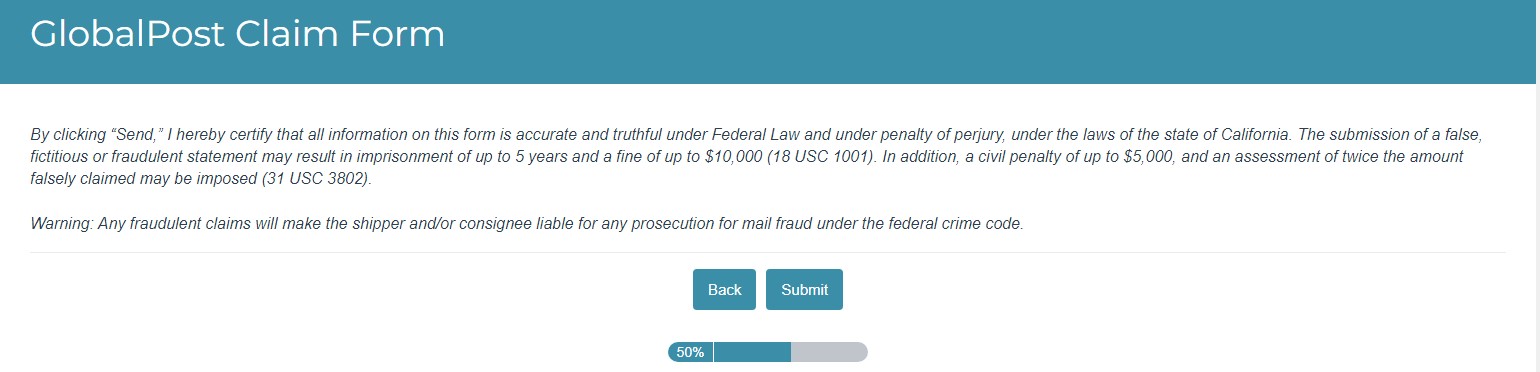
- Click next when all fields are completed.
- The next screen is just an affirmation that the data submitted is accurate to the best of your knowledge, that you are not filing a fraudulent claim, and the penalties if you were to, click Submit.
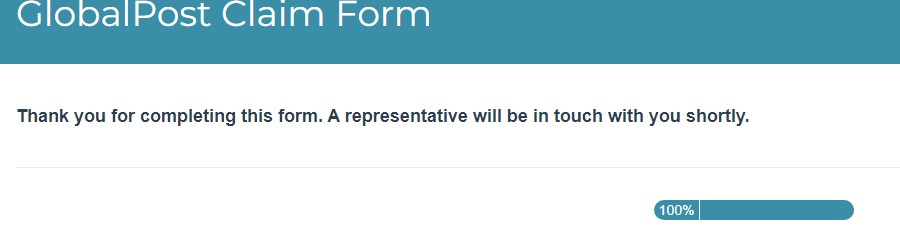
- The next screen is a confirmation that it has been submitted and that a representative will be in touch with you.
- With that update the customer’s elev8.one contact profile with the submission of the lost package and update the customer on the status if you have been communicating or with whomever requested the Lost Package Claim be filed.
- There will be an email that arrives from Global Post to your Inbox the first is just a confirmation that the claim has been filed.
Scale or Printer won’t connect to shipping computer
When processing packages sometimes the Scale will stop reading when the button is pressed or the thermal printer will not print the shipping label.
Here are the steps to resolve this.
If there is an issue with the Thermal Printer or Laser Printer
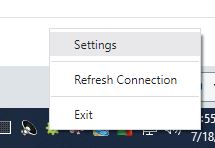
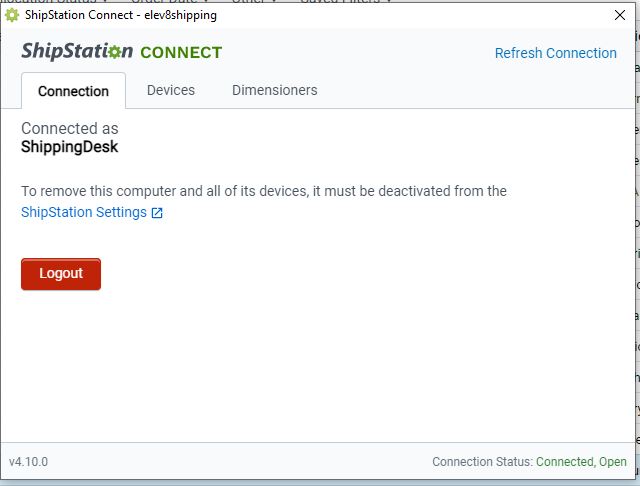
- Confirm that ShipStation Connect is running on the Shipping Computer.

- Right click on the icon in the system tray, if there isn’t a drop down that opens with the options to see settings, there is something that has stopped.
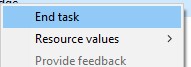
- Open the Task manager on the computer by pressing Ctrl+Shitf+Esc, locate the running processes for it.

- Right click on all ShipStation processes and click End Task
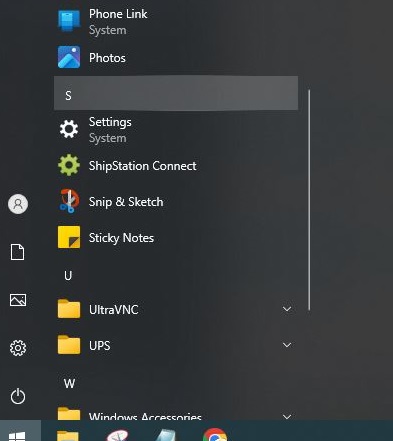
- Once all have been ended, go to the start menu to re-open ShipStation Connect.
- Once the system tray icon is responding go to the settings in it.
- Locate the Devices Tab and click on it.
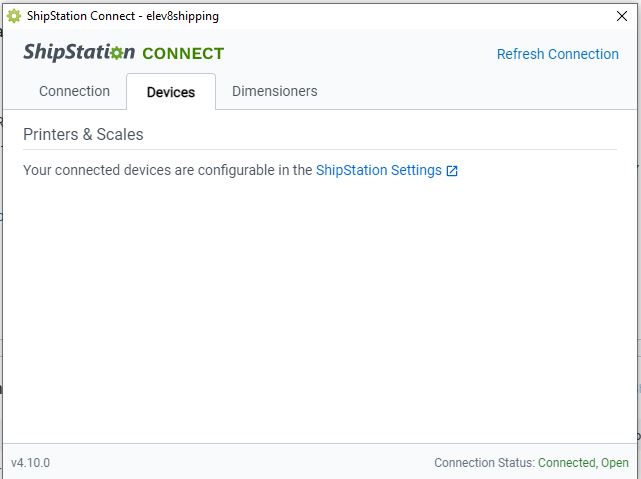
- Click on ShipStation Settings
- The scale should be the first entry in the list.
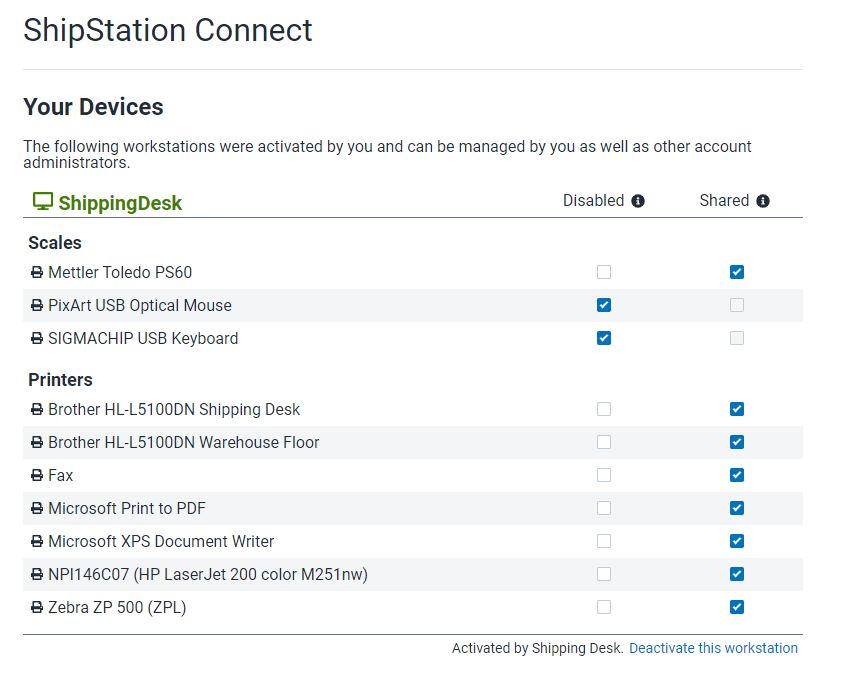
- When you hover over the Mettler Toledo PS60 two context functions will appear, read is the one we are looking for, that will read whatever the scale is
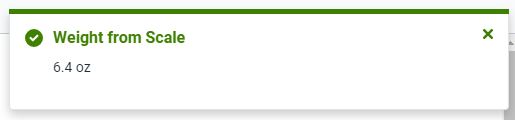 currently showing, before clicking it add something to the scale so it is not showing zero.
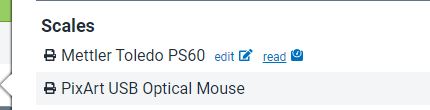
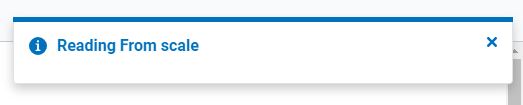
- Once clicked there is a status indicator it is reading it in the top right corner of the window.
- If the scale is successfully read, it will show the weight indicated on the display.
- If the scale does not show the weight it is still not functioning properly.
- At this point remove anything that was on the scale and tilt it up and disconnect the white USB cable, wait a few seconds and reconnect it.
- This will have power cycled the scale, make sure there is nothing on top of it as it is starting up, until it states 0.0 on the display.
- At this time place the package you were attempting to ship back on the scale and go to the order to test the scale function.
- If it completes you are good to go, if it is still not pulling the weight from the scale contact Steve or Adam to look into it further.
If the issue is with the Thermal Printer Follow these steps.
- Go to Settings, and Devices to confirm that the Thermal printers are showing up as online on the shipping computer.
- Once that is confirmed proceed to confirm that Ship Station Connect is running in the system tray.
- Also responsive.
- Once that is confirmed go to to the Settings Dialog and confirm that the connection is active.
- If any of these steps are not successful close all running instances of ShipStation Connect in the Task Manager by pressing Ctrl+Shift+Esc.
- Right click on the running instances and choose End Task.
- Once ShipStation Connect is reopened, and the status is “Connected, Open” and active. Click onto Devices Tab and then ShipStation Settings.
- The printers are the second section of devices.
- Confirm that all needed printers are Checked for Shared
- If you are still not able to print to the thermal printer Log out of ShipStation and log back in.
- If this does not resolve the p