When processing packages sometimes the Scale will stop reading when the button is pressed or the thermal printer will not print the shipping label.
Here are the steps to resolve this.
If there is an issue with the Thermal Printer or Laser Printer
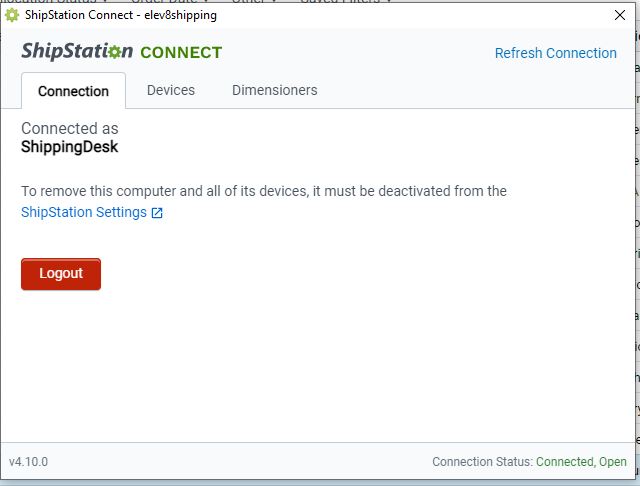
- Confirm that ShipStation Connect is running on the Shipping Computer.

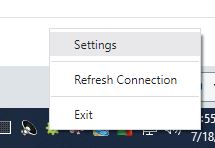
- Right click on the icon in the system tray, if there isn’t a drop down that opens with the options to see settings, there is something that has stopped.
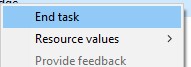
- Open the Task manager on the computer by pressing Ctrl+Shitf+Esc, locate the running processes for it.

- Right click on all ShipStation processes and click End Task
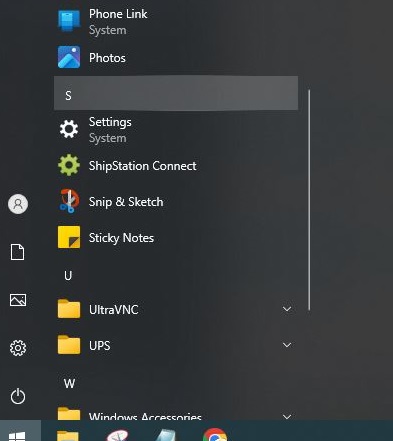
- Once all have been ended, go to the start menu to re-open ShipStation Connect.
- Once the system tray icon is responding go to the settings in it.
- Locate the Devices Tab and click on it.
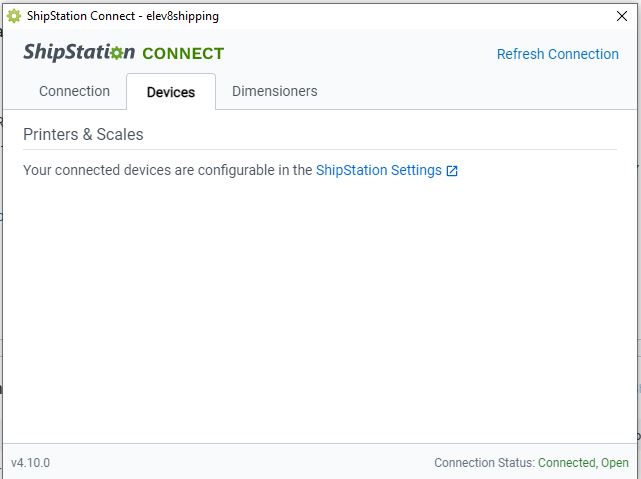
- Click on ShipStation Settings
- The scale should be the first entry in the list.
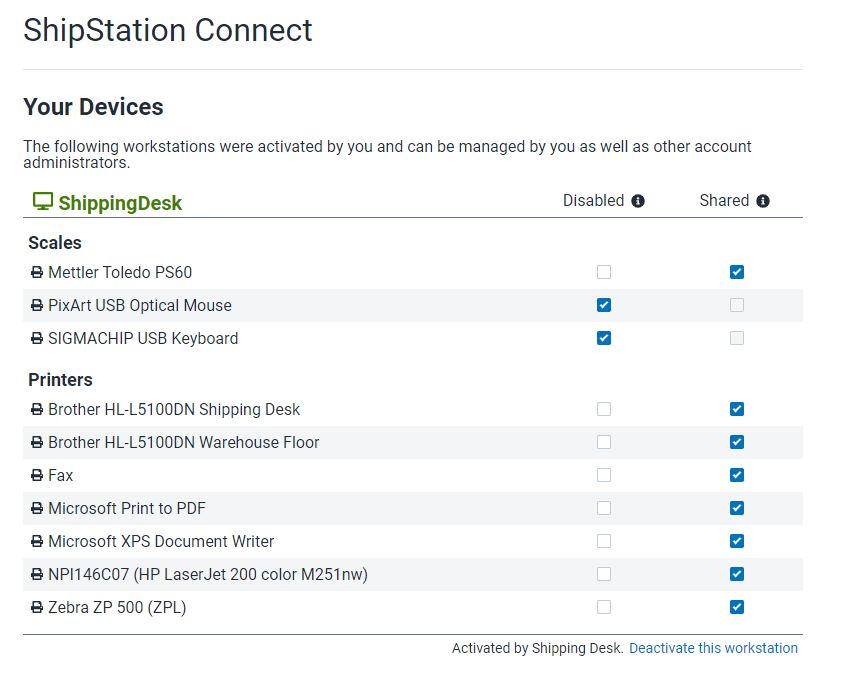
- When you hover over the Mettler Toledo PS60 two context functions will appear, read is the one we are looking for, that will read whatever the scale is
 currently showing, before clicking it add something to the scale so it is not showing zero.
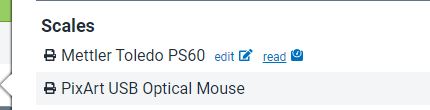
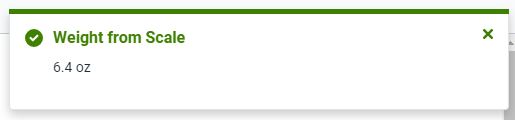
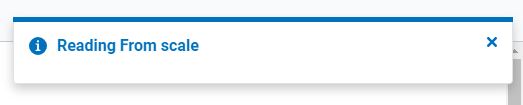
- Once clicked there is a status indicator it is reading it in the top right corner of the window.
- If the scale is successfully read, it will show the weight indicated on the display.
- If the scale does not show the weight it is still not functioning properly.
- At this point remove anything that was on the scale and tilt it up and disconnect the white USB cable, wait a few seconds and reconnect it.
- This will have power cycled the scale, make sure there is nothing on top of it as it is starting up, until it states 0.0 on the display.
- At this time place the package you were attempting to ship back on the scale and go to the order to test the scale function.
- If it completes you are good to go, if it is still not pulling the weight from the scale contact Steve or Adam to look into it further.
If the issue is with the Thermal Printer Follow these steps.
- Go to Settings, and Devices to confirm that the Thermal printers are showing up as online on the shipping computer.
- Once that is confirmed proceed to confirm that Ship Station Connect is running in the system tray.
- Also responsive.
- Once that is confirmed go to to the Settings Dialog and confirm that the connection is active.
- If any of these steps are not successful close all running instances of ShipStation Connect in the Task Manager by pressing Ctrl+Shift+Esc.
- Right click on the running instances and choose End Task.
- Once ShipStation Connect is reopened, and the status is “Connected, Open” and active. Click onto Devices Tab and then ShipStation Settings.
- The printers are the second section of devices.
- Confirm that all needed printers are Checked for Shared
- If you are still not able to print to the thermal printer Log out of ShipStation and log back in.
- If this does not resolve the p
When ever a shipment of Glass comes in there is always a QC check on at least a handful of the parts. If the product is the first time that it has been order potentially inspect each piece.
Opening the glass and making sure that the decals are in the correct location, that there isn’t cracks in the glass, if there are boils in the welds, or worse yet, the glass is completely broken.
When these situations do occur, document the nature of the breakage, if the piece has a crack, take a sharpie and circle the crack so it is visible in the photo, if it is something not fitting properly or loose take a video to show it occurring.
Once you have the documentation email the appropriate vendor and request either replacement or credit on future invoices.
As far as production parts, have the production team set aside and store pieces that are failing at a high level, or as soon as they are put into a product.
Once there are a number of them collected, reach out to the manufacturer to inform them of the issue and explain how they are failing, if there is anything that can be done to reduce this or if a new shipment is needed.
Periodically there will be items that do not scan.
When those are brought to our attention, there are a couple of things to check.
- Compare the SKU that is coming in from BigCommerce to what is in Elev8.one, if for some reason the item SKU has been changed on either side it will not scan properly.
- Is the QR code damaged?
- Is the QR code not able to be scanned straight on?
- Is the QR code too close to another QR code?
- Are you trying to scan it and the lighting is poor? move it to another space where there is better lighting.
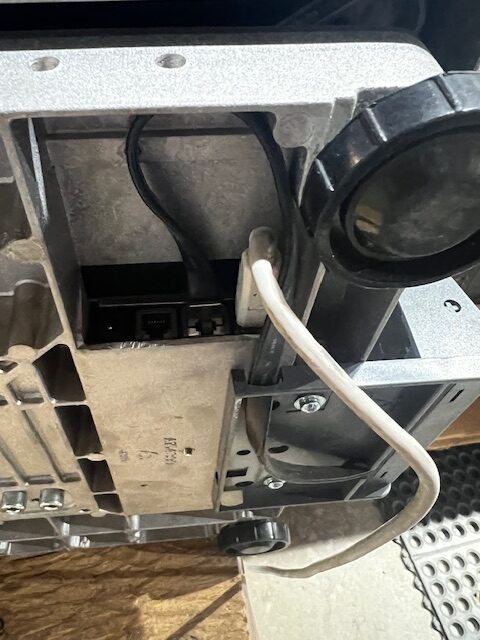
Sometimes for whatever reason the creation computer will not connect to the laser engraver.
- Make sure that the network cable connecting the Creation Computer to the Laser engraver is still connected.
- Once that is confirmed, look at the end of the USB Ethernet Port and confirm there is link activity on it.
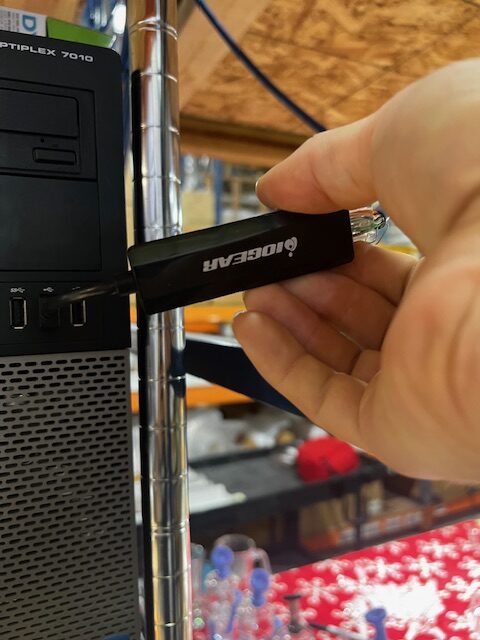 The Ethernet adapter maybe on either the front USB ports or the Back USB ports.
- Look at the front of the port and make sure there is light activity with the cable plugged in.
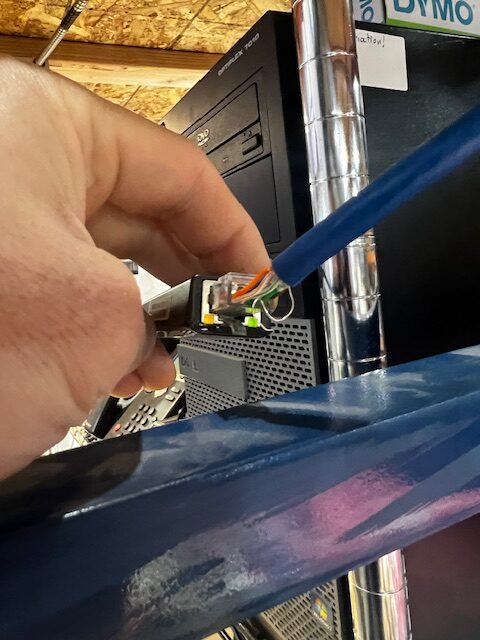
- If there is no activity try unplugging the USB device and plugging it back into the same port, if that shows light activity trying sending the print to the laser again.
- If that does not resolve it, try moving the USB device to another port.
- If that still does not resolve it, attempt restarting the computer completely.
If you already know how to map a network drive in Windows, here are the specs to Connect to the Company File Dump and New Media Array:
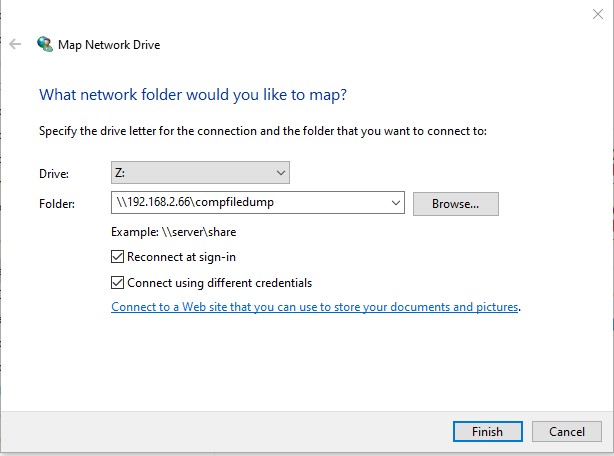
IP and folder for Company file dump \\192.168.2.66\compfiledump
IP and folder for New Media Array \\192.168.2.66\newmedia
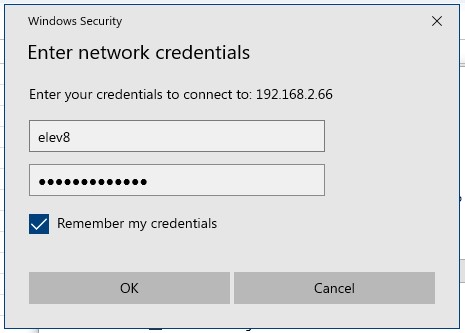
User account is on the Passwords Spreadsheet.
- Go to the computer that you are mapping the drive for.
- Open a File Explorer window.

- Click onto This PC in the left side bar.

- Go back up to the Top bar and now you will see the Map Network Drive icon, click on that.

- A new dialog box will pop up, where you will enter the information from the top of the article.
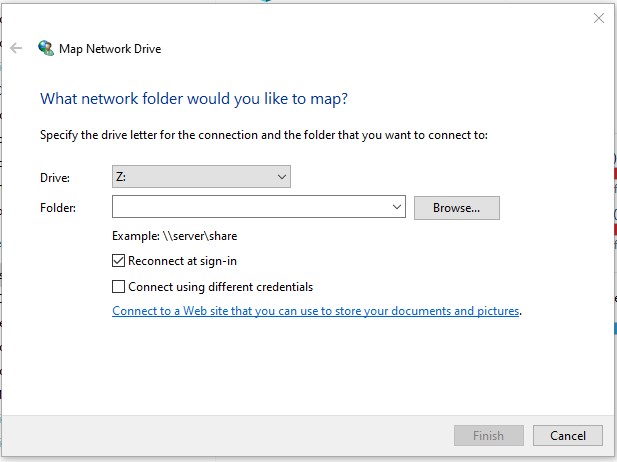
- Once the information is copied over check the box for “Connect using different credentials” The drive letter is not important just needs to be a drive letter that isn’t being currently used.
- Another Dialog box will pop up, and you will enter the username and password from the passwords spreadsheet, as well as check the box to Remember my credentials.
- Once you click OK, if all connects normally a new file explorer window will open and the drive will be accessible.
The bagging station will complete assembly of the SSV, at which point they will add it to the ship desk for checking and if there are any additional parts that need to be picked for the order.
- Remove the plastic bag if it is around the storage bag.
- The bag can be brought all the way off the unit.
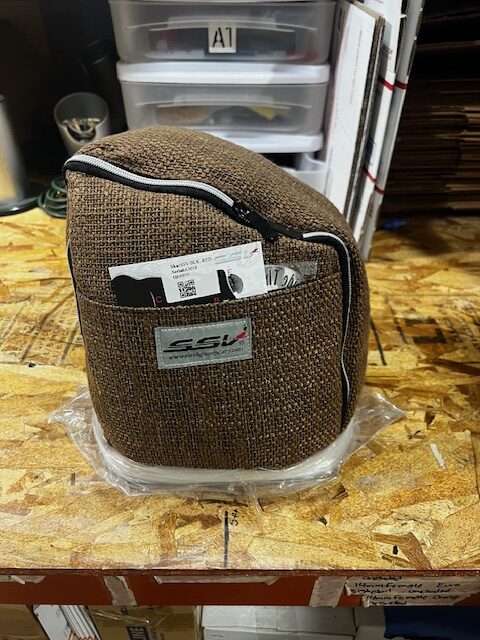
- Once that is done open the bag up, oriented so that the front portion rests on the table in front of you.
- First thing to check is the color combination, it is specified on the packing list as well as the sku on the production card.
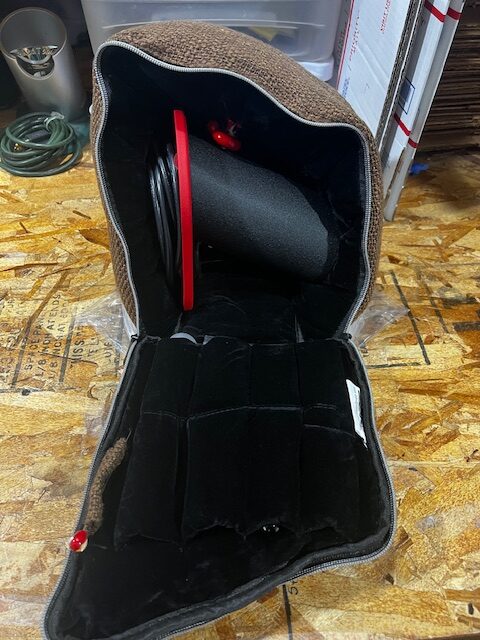
- Next to check is the cord style, make sure it matches to the required voltage the customer chose.
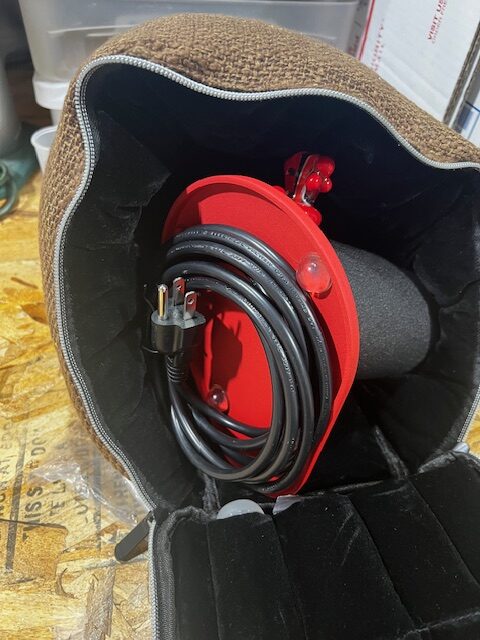
- Next make sure that the heater cover is installed, as well as the knob.
- the Hose is coiled around the inside of the storage bag behind the unit, confirm on the packing list what color they have chosen.
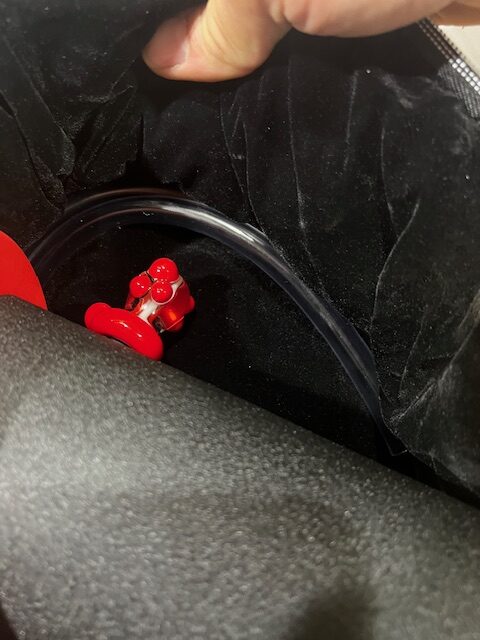
- Next we will be checking the wand, this is stored in the storage pocket on the inside of the front flap, on the far left longest pocket. Check the order to see if the customer has chosen a specific color for the frit in the wand as well.
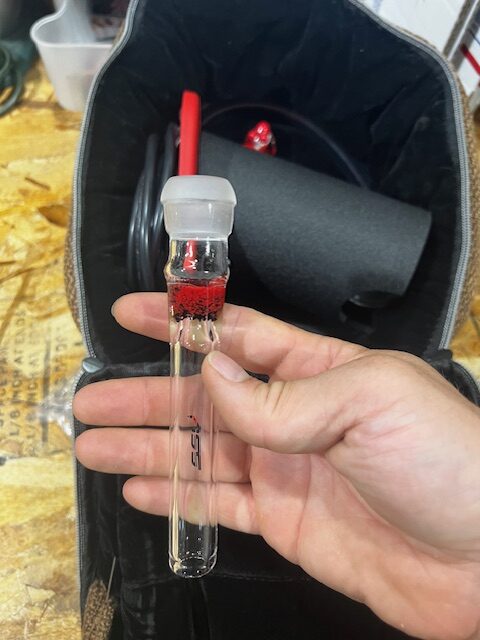
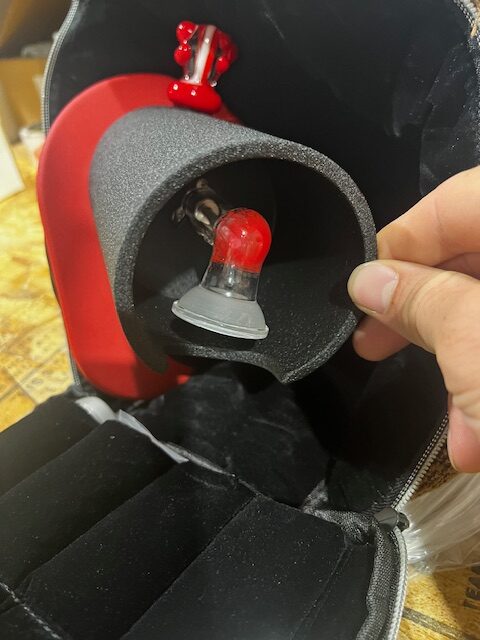
- Completely remove the wand from the pocket to inspect the screen is installed and proper.
- As well as the hose portion, always checking for cracks or blemishes as well.
- Reinsert the wand into it’s storage pocket.
- Make sure there is a Ceramic Flavor Disc in the bag, it’s in the pocket to the right of the wand.
- There shouldn’t be anything in the remaining bottom row pockets.
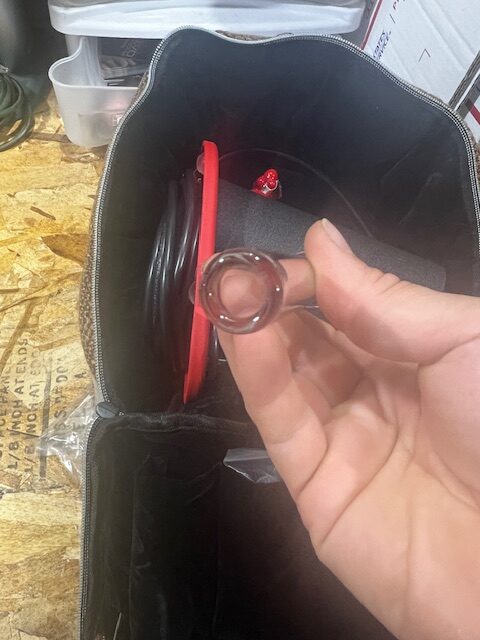
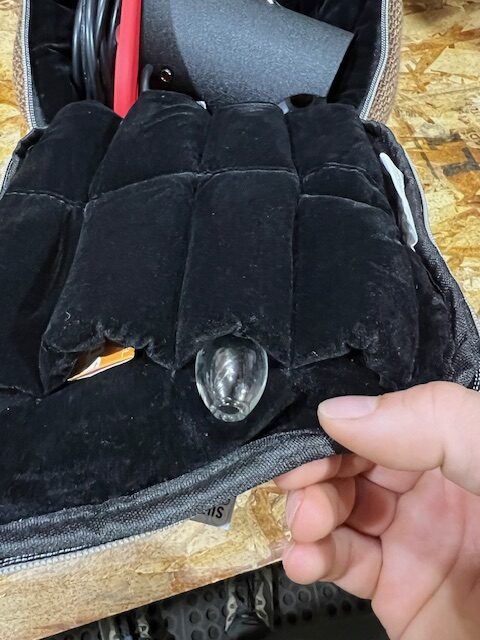
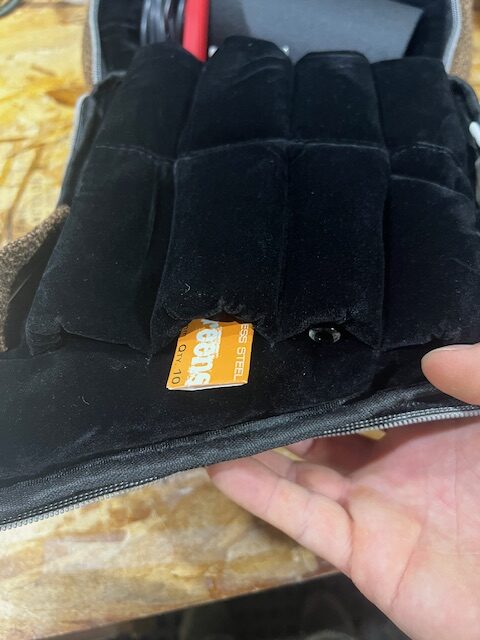
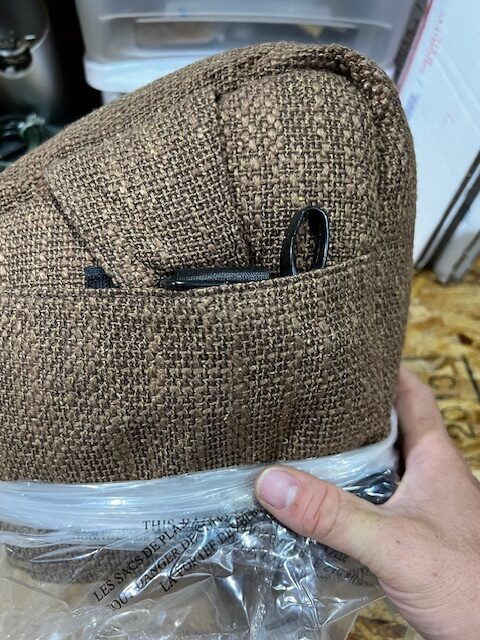
- Move onto the glass mouthpiece, the top row of pockets.
- Double check the packing list for the correct mouthpiece color.
- Check the mouthpiece for cracks or chips.
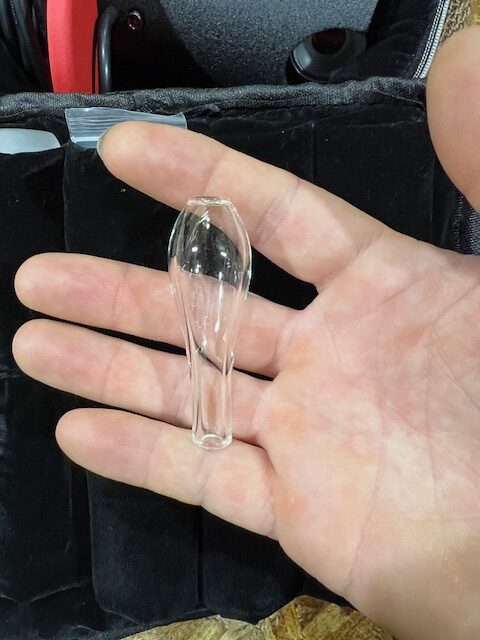
- Reinsert the mouthpiece into the pocket.
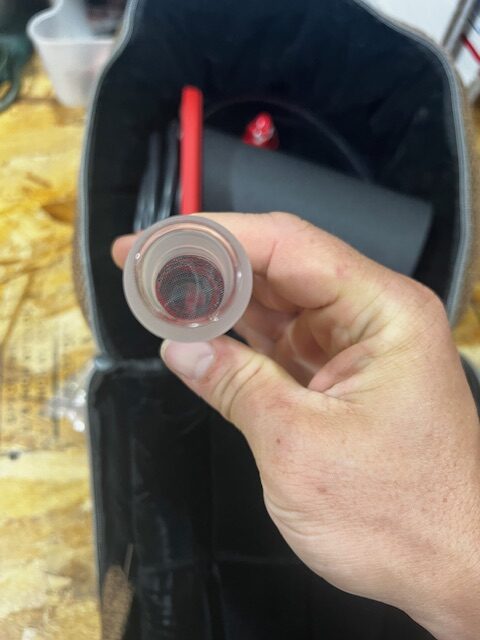
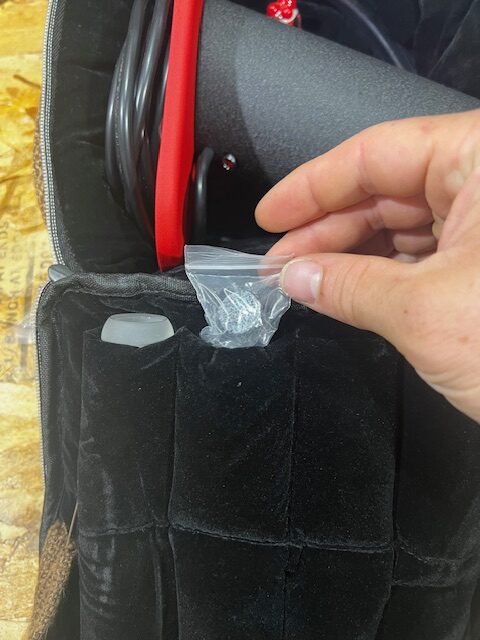
- Last inside the bag check is for the replacement screens, they are in the pocket to the right of the wand.
- Confirm it is the correct size for the wand. SSV=20.8mm
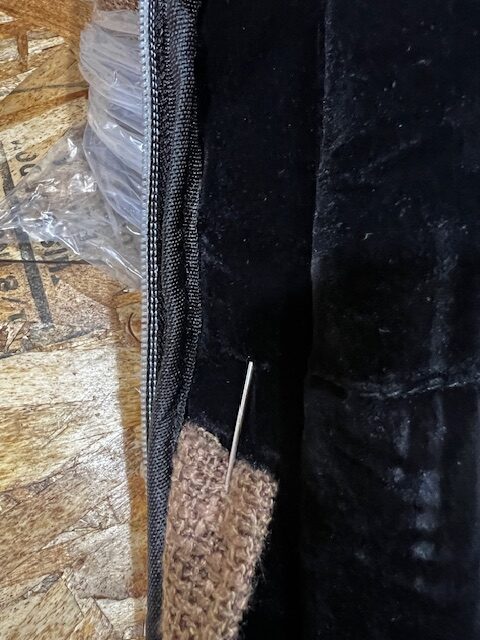
- Look to the left of the wand pocket to confirm a pick is through the tag.

- The pointed end should puncture the velvet lining so that the customer does not poke there hand when getting things out of the bag the first time.
- Once all items are securely stowed back in their pockets zip the bag back up.
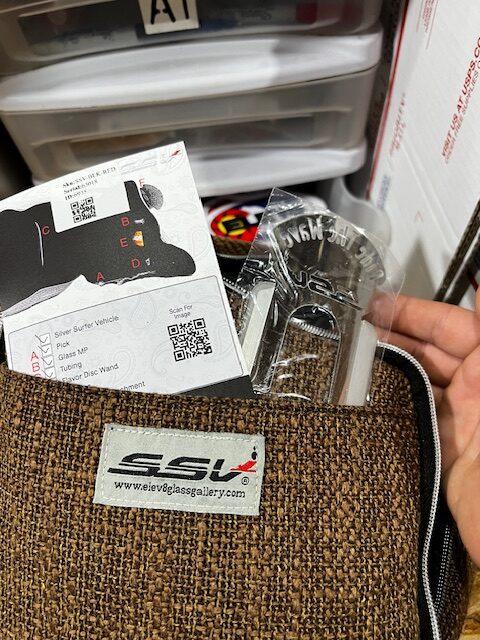
- Inspect the front exterior pocket to confirm that the Build Confirmation Card as well as the Hands Free Attachment are there.
- Lastly flip the unit around and confirm the carry strap is tucked into the back pocket.
- If everything is good, bag the unit back up and it’s ready to go with the rest of the order, or be boxed up if it’s the only item on the order.
When a customer trades in a DBV or an SSV for credit toward the purchase of their new unit, we will refurbish the old unit and clean it up to be put into use as either a Giveaway unit for a needing party, or for other charitable giving.
When the unit is received it is completely gone through to assure it is functional for the next recipient. Once that is complete the serial number is looked up in Elev8.one for modification to become an RSSV or RDBV. Make sure that the serial number is modified to match the RDBV or RSSV series already in Elev8.one.
Finally engrave the new serial number on the cord of the unit. Bag the unit and set it aside until it is needed.
