
In Big Commerce make sure that the Option set for the 500 error product doesn’t have pricing rules that take more than the price of the item off when an option is selected.
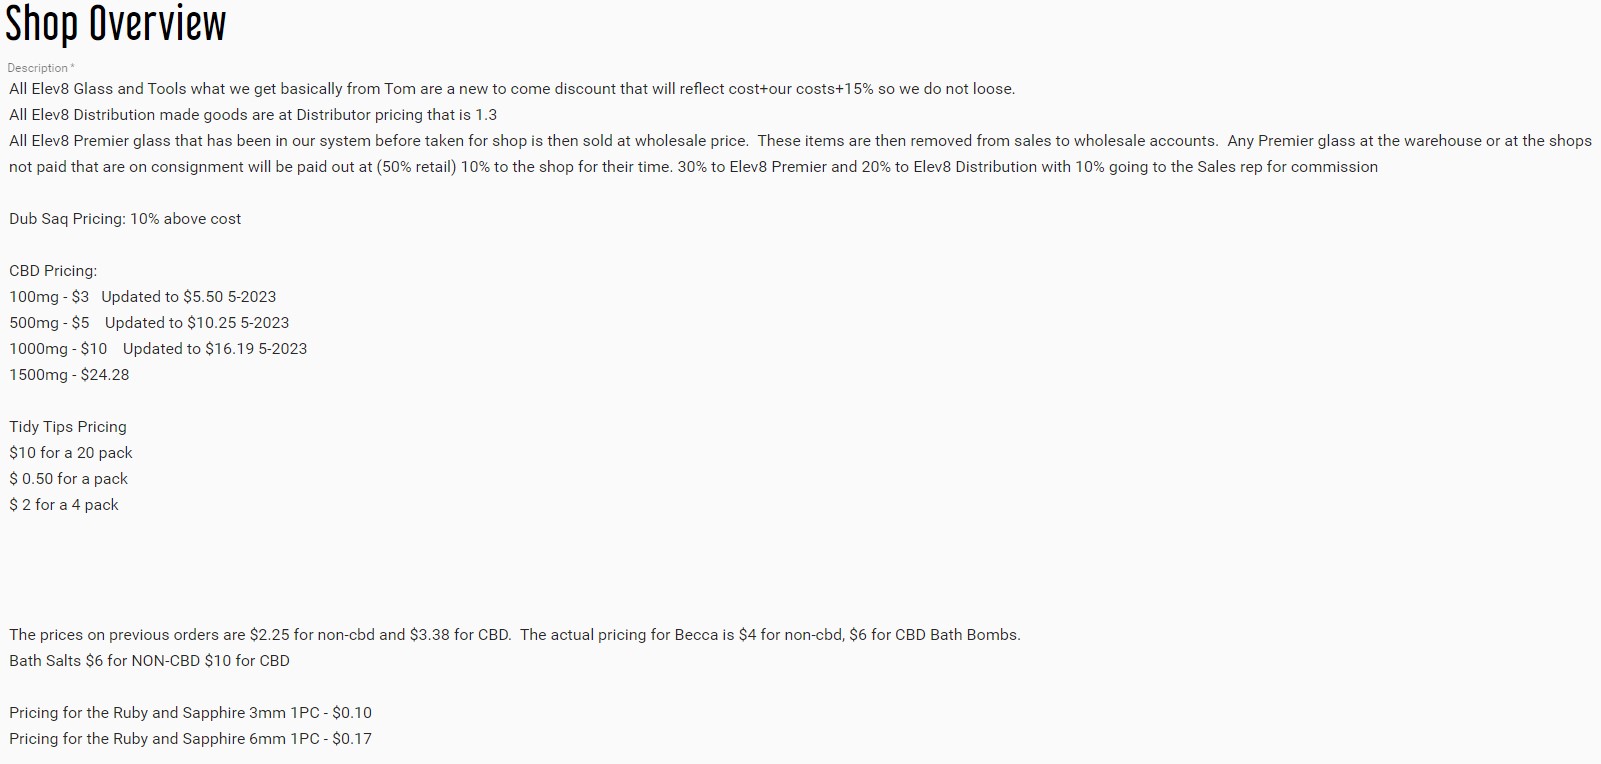
Confirming and documenting pricing for Internal Shops
There are three classes of pricing for Becca’s Orders running the shops
Items that are purchased just for her from Tom, and get the lowest pricing.
Items that are purchased and are stocked on our website for sale to retail customers.
Items that are purchased from outside wholesalers that have a minimum price we need to keep to make a profit.
Regarding Tom’s glass that Becca orders through us the pricing is Tom’s price + 15% added to it.
Items that are stocked on our site and produced in house her price is the retail price divided by 1.3
Last category is most likely going to be the price we pay plus 15%
The way each of these are represented for her orders are somewhat different for the products from Tom, if the product has a part in the Big Commerce system, it can be logged in the Customer Group for Hemp and Elev8 – 5% as a fixed price item.
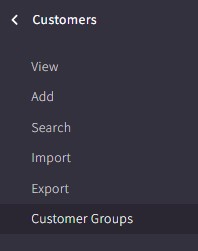
In the left side bar go to Customers, and click Customer Groups.
Look for the Hemp and Elev8 – 5% customer group and click on it.

Once in the customer group scroll past the Category Discounts, and look for Product Level Discounts
Scroll past the currently set up items and look for the button + Add product-level discount.
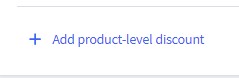
Once found click and it will bring up an empty field.
First thing is to pick the product you need to set a discount for by clicking Click to open product selector in the empty field.

This will bring up a fly out window that allows you to search the product list of big commerce.
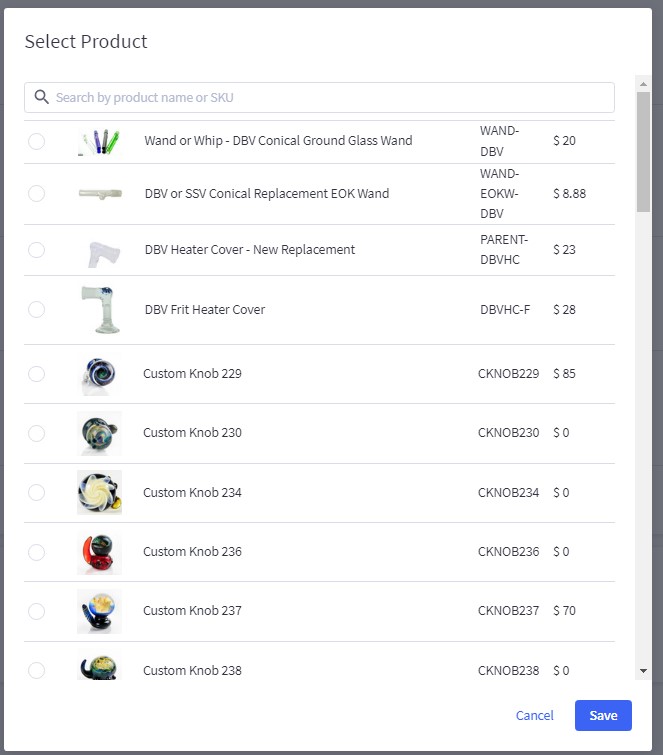
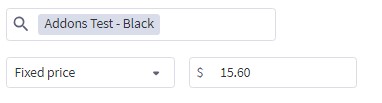
Search for the product in the top bar that you are trying to add a fixed price for.
Once the product is found click the radio button to the left of it.

Then click Save at the bottom right of the dialog box.
By default it will select Price Discount, we always want to change it to a fixed Price.
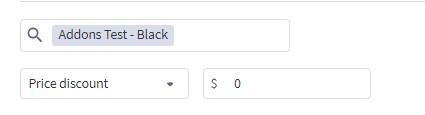
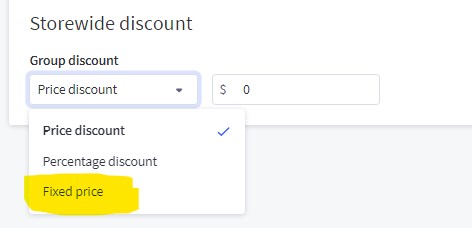
Once that is selected add the fixed price to the field to the right.
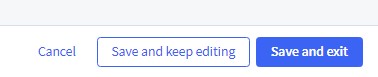
After the pricing is complete, move your mouse to the very bottom of the page, and click Save and Exit if you are done creating pricing rules or Save and keep editing if you have more rules to add.
Products with a Parent Product and then Child Variants in the Big Commerce SKU List.
Since a Parent level product must have a price as to not look like it’s free on the front side of the site, we aren’t able to set Fixed pricing for a variant of a product and the price for Becca to come through properly.
To resolve this we need to duplicate the products and make them (Hemp and Elev8 Only) SKUs.
The process starts with locating the Part: Variant SKU for the product you would like to set a fixed price for.

Go to the right side of the entry, and click on the 3 dots menu.
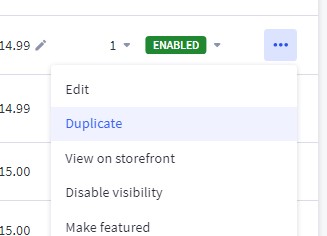
Click on Duplicate
You will be brought to a new Product entry with the Copy of before all of the name and SKU fields.
For the Name field we will remove Part: and add Hemp Elev8 Only to the beginning of the name.

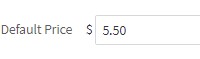
Set the price in the Default price field.
For the SKU add HEO to the beginning.

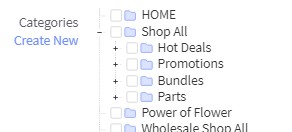
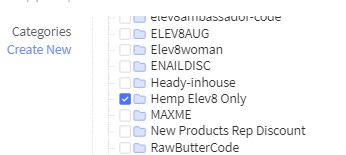
Next remove the product from the Shop All > Parts Category and instead add it to the Coupon Products > Hemp Elev8 Only category. This step is very important because it will prevent the product from showing in any other customer group.
Once that is complete move your mouse to the bottom of the page and click on Save.
Move onto the next product you need to modify.
Products we stock on the site
You will set the price for these in the product Category Discount
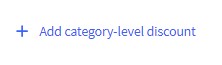
Access the Customer Group for Hemp and Elev8 – 5%, scroll to the bottom of the Category-level Discounts, and look for the button + Add Category-level discount
Once you click on that item you will be brought to the bottom of the category-level discount entries.
Click into the Click to open category selector

Once you click on that it will bring up a flyout dialog that gives all the site categories.
Expand the Elev8 category.
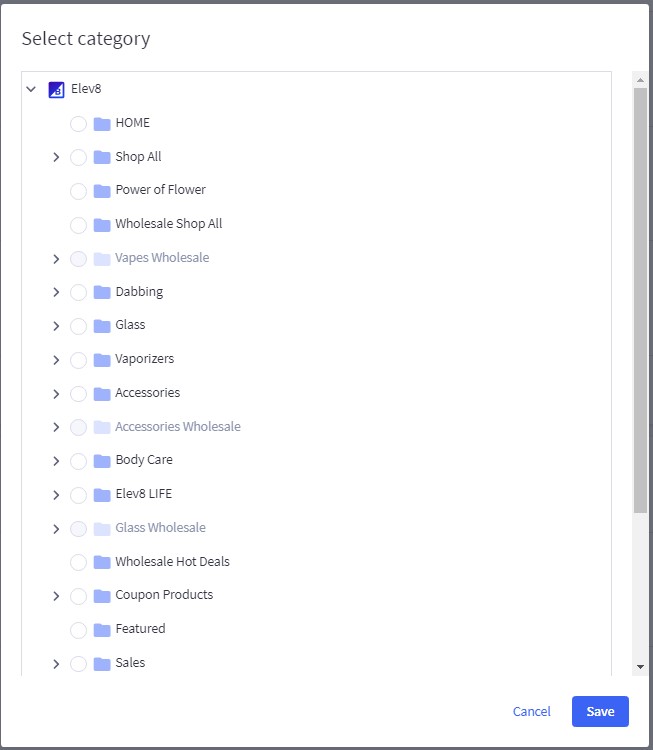
Choose the category you would like to discount and click the radio button to the left of it.
Click Save at the bottom of the fly out.
The same as the Product-level discount it defaults to the Price discount, you want to change this one to Percentage discount.
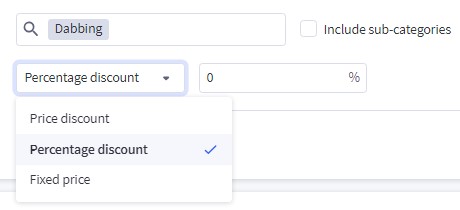
Once that is selected add the percentage discount most likely 61.53
Some categories will have Sub Categories that include specific items, check if you need to include the Sub-categories by checking the tick box next to it.
Move your mouse to the bottom of the screen and click Save and Edit if you still have more categories or product level discounts to add, or Save and Exit if you are done.
As well as in the customer group make sure that prices are documented in the Elev8.one Account Summary for Elev8 and Hemp as well.
Answering incoming calls when others are out of the office.
When all other are out of the office between the hours of 9 am and 3 pm, there may be a time that you are called on to answer an incoming call, the customer service lines ring at four different stations: Shipping Desk, Adam’s Desk, Marketing and Web Desk, and Creation Computer.
You can answer a ringing call at any one of those stations, if you need to, you can transfer it to another station if you need to access a different computer by following this link Transferring Calls
But before all that, this is what you say when answering the phone:
“Elev8 Glass Gallery.com, this is YOUR NAME speaking, how may I help you?”
If the customer has been speaking with another representative you can start by asking “Is there anything I can help you with?” Look up their account in Elev8.one and see if there are any notes from the previous interactions.
If the customer states yes, do whatever you feel comfortable that can help move the process forward, don’t be afraid to say that you are not able to help them but that you will document and get this to someone that can as soon as possible, make sure you add any new information you receive and log the call in the customers account in Elev8.one.
Lastly always conclude your call with “Is there anything else I can assist you with today?” if the customer states no, then proceed to close the conversation by which ever way feels best to you, “have a great rest of your day”, “thanks for calling in today” or some variant of that.
Once off the call make any notes in their account on elev8.one and send emails to the other parties that helped the customer previously or will help them going forward.
Invoicing customers for shipments that have gone out when main sales person is out
When a wholesale order is ready to ship check the payment method on it, more than likely it has not been paid for at the time of shipping.
- Look at the order in Big Commerce, if there is a payment made it should be marked as paid, otherwise it would be awaiting payment.
- Look at ShipStation to confirm the cost of the shipping for the order.
- Go back to the order in Big Commerce and see if the shipping method has a quote or is set to Contact with Wholesale Shipping quote.
- Once the shipping amount has been added in, save the order to calculate the purchase total for the order.
- Next go to Elev8.one and find the customer account, look for any notes regarding payment or in the customer summary to confirm how they prefer to pay or if there is a specific party to reach out to for payment.
- Once you have that proceed to reach out to the party named, otherwise just call into the contacts listed for the account.
- If they prefer to pay with Credit Card make sure you have access to an Authorize.net login, and the procedure to take a credit card payment.
- Once the payment has been processed record that the payment was made and the shipping tracking has been recorded for the order in Big Commerce.
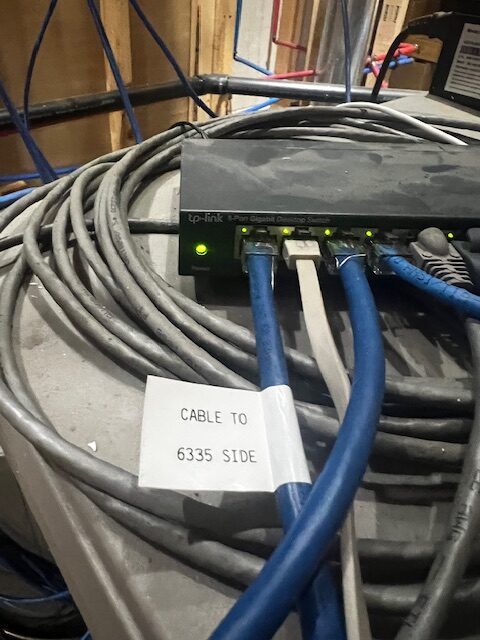
The Glass Studio Side isn’t getting internet.
- Confirm that the 6335 Side has internet, go to any one of the computers and try to access a website.
- If this side internet walk up to the Server Closet and look at the Blue box to the left side of the shelf.

- Confirm that the cables are plugged in properly and that the ports have green lights on and flashing to show activity.
- Trace the left side cable to the Router, and look at that port to confirm it has green flashing activity lights.

- If those are all looking normal go over to the Glass Studio side.
- Walk upstairs to the NVR station and look to the left side of the table for the Gray Switch.

- The far left cable is the other end of the cable to the 6335 Side. Make sure there is connectivity on that port.
- Lastly check that the Decco Wifi Extender is connected and powered on, there is a light in the top of the unit that should be illuminated.

- Also the second port on the switch can be checked for activity.

- If all of those things look normal go back to the device that wasn’t able to connect and make sure there are no other underlying issues, lastly contact Adam.
New Customer Password Link has Expired user account email.
When a customer creates an order on Elev8 Glass Gallery, Big Commerce sends out an automated message to the customer to allow them to add a password and finish setting up their online account. Unfortunately that email is only valid for approximately an hour after it is sent.
When the customer reaches out regarding an updated link, please send them the following verbiage.
“Hello,
I see you are having an issue with setting up a password for your account, unfortunately those email links are only valid for an hour or so after they are sent.
The easiest way to get this account finished setting up is go to the Account page on the Elev8GlassGallery.com, look to the right of the SIGN IN button and click Forgot your Password.
Once you’ve entered your email address, Click RESET PASSWORD, another link will be sent to the email address entered.
Click through the link in the newly sent email and it should give you the option to enter the password for the new account.
If you have any questions, please let me know.”
If the customer is still having issues with the account set up we are also able to set a temporary password in the Customers sidebar for the specific account, something unique to the customer such as first name + zip code, or last name and street number, something they’ll know and once logged in they can change the password.
Fielding Complaints from Co-workers
Regarding complaints in the workplace no matter what the issue is, it needs to be treated with the utmost seriousness and documented that it was brought forward.
Be it a complaint regarding an issue with the company or with a fellow co-worker, the best way to make sure it is not lost is to document at the time of the complaint and then put the proceedings into a digital file either stored on google drive or on the Personnel Drive using this file
Going through the complaint form is pretty self explanatory.
Document the Employee name, position, Location, date the complaint was brought to you, and employee’s immediate supervisor.
- Describe the incident(s): if the employee is coming to you immediately after it occurred, they may need some time to collect themselves, allow that to occur before you press them to describe the situation that has brought them here. Is is good to make a note of the emotional state they were in when they did come to you regarding the incident depending on the severity it may be needed to add context at a later time.
- Ask the the employee to describe what happened and to be as descriptive as possible, but avoiding subjective statements such as “I feel” or other statements of conjecture, the main aspect is to get the facts of the incident, as well as avoiding any judgement calls as the person fielding the complaint from the other employee. Do not let your emotions one way or the other regarding the parties involved taint the narrative.
- Ask who was responsible for the incident, take full names down.
- List any witnesses that were directly involved or a party to the incident, do not list a fellow employee that the party to the incident spoke with before coming to HR or does not have first hand knowledge of the incident to contribute.
- Document where the incident took place was it on the premise of the business, was it off site.
- Finally what dates and times did the incident(s) occur, this is somewhat coupled with the previous question, did this occur on site and during the work period, or was it before being clocked in for the day, outside of the building or on break. Does not need to be down to the minute but should be a general estimation, i.e. before lunch on Tuesday the 23rd, after returning from first break on the 12th.
- The last thing to do is to get the signature of the employee after you have entered the information on the form, this is to confirm that the information provided is accurate to the best of their knowledge as they have presented it to you for documentation. Have the employee print their name below signature to remove any confusion, and then date the form as of when it was signed.
The Media Array isn’t showing up
You aren’t able to access the New Media Array or Company File Dump.
Ask if someone else is able to access it?
Check if you are connected to the network, or if your connection is having issues by opening a web browser and attempting to reach a site on the internet.
If others are able to access it, it may be a problem with the drive mapping, which can be reconnected with the following article Mapping network drives
If you aren’t able to connect to a website, trouble shoot your network connection before proceeding.
If the New Media Array isn’t connecting on multiple machines and you aren’t able to remap the drives.
Go up to the Server Closet and confirm the new Media Array server is on.
The Raid Array Server is the right side of the shelf and is labeled.

Once you have located it confirm it is Powered on.

There should be a green Power light on the left side, as well as a blue light illuminated, and the drives should be periodically blinking.
If you don’t see the Green lights, or hear the fans running, look to the back of the unit on the left side and confirm the power cords are connected.

If they are both connected, go below the shelf and look for the black box labeled Battery Backup.
The two power cords should be plugged into the back of it.

Confirm they are both plugged in and the Battery Backup is functioning.
Once all steps have been completed go back to the front of the Server and press the power button and see if the server comes on.

If the server turns on, wait about 5 to 10 minutes and see if the New Media Array is back up.
If the Server is was running when you came up to check it, the next thing is to make sure it is connected to the network.
If you look to the left of the silver vertical device you will see a black device labeled 6335 Side Connections.

Look at Port 15 and Port 5 those are the network connections for the Server, if they are not blinking Green, there is something preventing the server from accessing the network.
If they are Blinking Green return to your computer.
Open https://192.168.2.66
Click Advanced and then click Proceed to 192.168.2.66 (unsafe)
Find the login for the Truenas Server on the Passwords Spreadsheet.
Login to the interface.
If the Storage Pool window looks like this:

The pool is functioning and should be available. If it is not, click into the details to find out what drive has failed.
Click into Storage in the left side bar, and Pools below that.

Click the Gear in the top right corner of the Elev8-Pool Box, and Click on Status.

The next screen will show the status of each Drive in the Array, and if it’s Online that means it is functioning properly.
If there are any that are showing Degraded or Offline, that drive needs to be replaced with a drive of the same size or larger capacity.
The drives are stored on top of the server near the phone server.

Remove the drive from the anti-static bag when ready to install it in the drive sled
To locate the failed drive you may have to turn off the Server to pull individual drives to determine which one has failed, based off of the serial number on the drive label corresponding to the failed drive in the software.
Once the failed drive is determined and made offline, you can remove the drive from the housing by opening the pull handle. Utilizing the red button to the left of the pull handle.

Grasp the pull handle and slide the drive out.

Once the drive is out, remove the small screws holding it into the drive sled, install the new drive in the reverse of the previous process.
Slide the new drive back into the server and press until the small handle can close completely and drive begins to blink.
Go back to the disks page of Truenas, click on the 3 dots next to the offline drive, and click replace.
This will begin the resilvering process that may take multiple hours, it is not recommended to do anything on the drives while the resilvering process is in progress.
Once completed check that the storage pool is no longer degraded.
Attempt to access the storage array again from a computer that has the drive mounted.
How to Apply Discount to Manual Orders
When processing a discount on parts in a manual order, do not lower the actual part cost, calculate the discount and apply that on the final screen of the order.
Maintaining the function of all Google instances hosting WordPress sites
Checking if google instances are running.
Open Cloud.google.com
Login with Username and Password listed in the Passwords Spreadsheet.
Once logged in, go to Console
You will see a drop down in the top bar next to Google Cloud Select the instance you need to check.

Once you have clicked on the one you want to check, go the left side bar, and click the Hamburger Menu at the top.
Go to Compute Engine

You will be presented with the list of the google Instances associated with the account.

If there is a Green Check to the left of the Instance, that means it is currently running.
The External IP is the address that the instance can be accessed at.
If there is something you need to do with the instance you can load up Putty to access it.
Or Click on the SSH button to the right.
If the site isn’t loading, you can check if the webserver is running, but copying the following command.
sudo /opt/bitnami/ctlscript.sh status
It should return the following if all is running normally.

If you need to restart the webserver because you have updated something run the following command:
sudo /opt/bitnami/ctlscript.sh restart
Once the command has completed refresh the browser window that you were accessing the site from.
To close this window type the following command:
exit
That will log out of the SSH window and close the connection.
If you are having issues saving new articles or media to WordPress.
The instance may be out of space.
Open an SSH window for the instance you are trying to check.
Type the following command:
df -h
The information returned will be the available space on the hard disks allocated for the instance.

The top entry /dev/sda1 is the main drive, since it is showing 67% use there is still plenty or room on it.
If you were at 100% use you would need to increase the allocated drive size.
Which is done in google instances as well.
- Shutdown the instance, drive changes require the instance to be powered down, make sure there isn’t anything important that isn’t saved before powering down the instance i.e. the article you were trying to save to the website.
- Left Click on the three vertical dots to the right of the SSH button. This brings up more actions, the one below Start/Resume is what we are looking for Stop, left click that.
- Once the status of the instance is showing a black circle with a white square it is powered down.

- At this time go the left side menu of the screen and click on Disks, this will bring you to a window similar to instances but it is just the Disk image for the instance, click on the name of the instance drive.

- Next click on the Edit button in the top bar.
- The first box on the Edit window will be the Disk Size.
- The size is represented in GB or Gigabytes, you can replace it with a higher number that is appropriate for the expectations of needed size for the instance, i.e. usually 5 GB at a time.
- Once the size has been updated.
- Click Save at the bottom.
- At this point click back to the Instances window from the left side bar.
- Click on the three Vertical Dots to the right of the SSH Button and click Start / Resume.
- Wait for the instance to show a Green circle with a Check for the Status, and then click SSH to open the access terminal.
- Use the
df -hand thelsblkcommands to list the size of the file system and to find the device names for your disks. - Verify the partition type: sudo parted -l

- If the drive is not showing the new size you will need to resize the partition for to realize the increased space.
- Type the command:
sudo parted /dev/sda
- At the prompt type:
resizepart
- At the Partition number? prompt type:
1
- At the Warning: Partition /dev/sda1 is being used. Are you sure you want to continue? prompt type:
Yes
- At the End? prompt, type:
100%
- Read the new partition table using the command:
sudo partprobe /dev/sda
- Extend the file system, using the command:
sudo resize2fs /dev/sda1
- Lastly us the df -h command again to confirm the new disk size.