We do not make these Ground Glass Stands to scientifically-exact measurements, these are hand made and are not scientific instruments, but we can provide a range and average for some of the stands which we had on hand at the time of writing this article:
Base Diameter — ranged from 2.1 inches to 2.3 inches (53mm to 58mm). Average diameter was 2.23 inches (56.5mm).
Height — ranged from 2.1 inches to 2.3 inches (53mm to 58mm). Average height was 2.23 inches (56.5mm).
Weight (Mass) — ranged from 57.52 grams to 60.89 grams (2.03 ounces to 2.15 ounces). Average weight was 58.87 grams (2.08 ounces).
Keep in mind that if you have a specific usage that will require a wider base, we would be happy to make one to your specifications! Just give us a call at 719-570-9928.
The Customer Reviews page at https://www.elev8glassgallery.com/customer-reviews/ is built entirely using BigC’s Page Builder tool. In order to add new testimonials you will need to find and open the page in Page Builder:
Adding a testimonial to the main columns:
- Open the back end of BigCommerce and click on “Storefront” on the sidebar menu.
- Under “Themes” click the blue button that says “Customize“, this will take you to the Page Builder.
- In the top left of the screen there is a dropdown menu, click it and scroll down until you find “Customer Reviews”, click on “Customer Reviews“.
- There is a carousel at the top of the Customer Reviews page, and then below that there is two columns of testimonials from customers. Click one of the columns.
- Now when you highlight the testimonials, it should be highlighted with a blue rectangle that says “HTML” in the top left corner. Click on the blue box.
- On the sidebar, click the button that says “Expand HTML Editor“
- Press CTRL+A to select all of the code in the HTML Editor. Press CTRL+C to copy the code. Now click “Cancel” in the bottom right corner to exit the HTML Editor.
- Click the column where you want to add a new testimonial.
- Grab the “HTML” widget from the sidebar and drag it below the last testimonial in the column, this will insert a blank HTML widget.
- Click the new HTML widget block and click “Expand HTML Editor” in the sidebar.
- Erase all of the code, and press CTRL+V to paste the HTML that you copied in Step 7.
- You will see two lines of code, the first starts with “<h3 style=”text-align: center;”><strong>”. The text in-between the “<strong></strong>” tags in this line should be the customer’s first name and the state where they live. Change this to match the customer for whom you are adding a testimonial.
- Here is an example, the text in bold is what you will change:
- <h3 style=”text-align: center;”><strong>Nickolas from Colorado, USA:</strong></h3>
- The second line of code is where you will put the actual text of the testimonial. You should paste this text in between the tags that say <p style=”text-align: center;”></p>
- Here is an example, the text in bold is what you will change:
- <p style=”text-align: center;”>You guys rock!</p>
- Once you have made the necessary changes to the code, click the blue “Save HTML” button in the bottom right corner.
- In the top right corner of the Page Builder, click the white “Save” button and allow the page to refresh.
- Now click the blue “Publish” button in the top right corner. This will make your changes visible to the public.
Adding a testimonial to the carousel at the top of the page:
- Click on the carousel, the sidebar should change to a menu for editing the carousel.
- You should see the slides that make up the carousel, and each slide will have three dots to the right. Click on the three dots to the right of the last slide and click “Duplicate“. A new slide should appear at the bottom of the list.
- Click the new slide in the list and the carousel should change to that slide.
- Click on the carousel itself, and you will see that you can edit the text in the white box directly by clicking on it.
- Change the large text at the top of the white box to the customer’s first name and state., i.e. “Nickolas from Colorado, USA”
- Click the smaller text below the customer’s name and paste the customer’s testimony into that field.
- In the top right corner of the Page Builder, click the white “Save” button and allow the page to refresh.
- Now click the blue “Publish” button in the top right corner. This will make your changes visible to the public.
This is a generalized schedule with suggested time usage, this is not a strict itinerary as Marketing/Web must adapt to whatever situations are presented day-to-day. Marketing/Web should try to touch on as many of these areas as possible each day to ensure that all of these tasks are being moved forward. You may also be pulled into various tasks for Production or Shipping throughout the day, so on those days you will need to prioritize the more important tasks like removing sold glass from the website, etc. If your time for marketing tasks is limited, find the ‘biggest rocks’ that will have the most impact for the company.
- 8:00-9:00am — OOS Notifications and Emails (making adjustments to website as needed)
- 9:00-9:30am — Instagram (Bingo, messages and comments, posting Reels, etc)
- 9:30-10:00am — YouTube (improving descriptions, making edits)
- 10:00-11:00am — New Products
- 11:00-12:00pm — MARKETING (BigCommerce SEO, meta descriptions)
- 12:00pm-1:00pm — LUNCH
- 1:00-2:00pm — MARKETING (Dub Saq, Simply Soluble, Ambassador, newsletters, etc.)
- 2:00-3:00pm — MARKETING (Focus on videos – ideas, supplies, editing)
- 3:00-4:00pm — MARKETING (Send out Elev8 University Certificates and make lesson edits)*
- 4:00-5:00pm — Final hour (end of day tasks, emails, last minute fixes, etc.)
*This time can also be used for additional video-related tasks if needed.
Click here to go back to the Marketing/Web Manual Master Page
In the case of products which are kits that we prebuild and stock as built kits, we should not have pick lists for each item in the kit. For a lot of our other products that have multiple items included (vaporizers, etc) we will have ‘pick lists’ for each item because the products have to be picked and scanned by whoever is building the order. In the case of kits like the Essential Oil Kit or Baller Series Conversion Kit, however, we build these kits in advance and pick the entire kit when it comes up on an order. For this reason we shouldn’t have ‘pick lists’ for each item in the kit because it will not work with our workflow, it would require the picker to scan multiple QR codes despite the fact that the picker is not actually picking those individual items. Instead, when a picker grabs a kit like an Essential Oil Kit they only scan a single QR code which covers the entire kit.
If you want to add a clickable email address to any body of text on Elev8GlassGallery.com (BigC) or any of our other websites, then you will need to use HTML5’s “mailto:” function. This creates an email link that, when clicked, will open the user’s default email app. The function will take the user to a new blank email with the target recipient address already filled in.
BigCommerce has the ‘mailto:’ function integrated into its ‘Link’ menu when using the WYSIWYG editor, but it’s not immediately obvious how to use it. Here’s how you can create a clickable link in BigCommerce’s WYSIWYG:
- Highlight the email address that you want to turn into a clickable link.
- Click the ‘Insert/Edit Link’ icon on the editor menu. It looks like a small section of a chain. Wait for the Insert/Edit Link menu to open (it takes a while sometimes).
- In the Link URL field, type “mailto: insertemail@here.com” (remove the quotation marks and replace ‘insertemail@here.com’ with the actual email address you are using).
- Click the ‘Insert’ button at the bottom-left corner of the popup window.
- Click ‘Save’ at the bottom-right corner of the Edit a Product page.
This essentially works the same way on WordPress. If all else fails, you can also just use the following HTML code to accomplish the same thing (don’t remove the quotation marks from this though!):
<a href=”mailto:insertemail@here.com”>insertemail@here.com</a>
Note that you don’t necessarily have to write out the email address in the link. You could add an email hyperlink to a piece of text that says “Click here to email us!” but it’s considered good practice to write out the email address as well because ‘mailto:’ can be buggy on some devices, and some users would prefer to copy and paste the address which they cannot do if we only provide a link that says ‘Click here to email us!”.
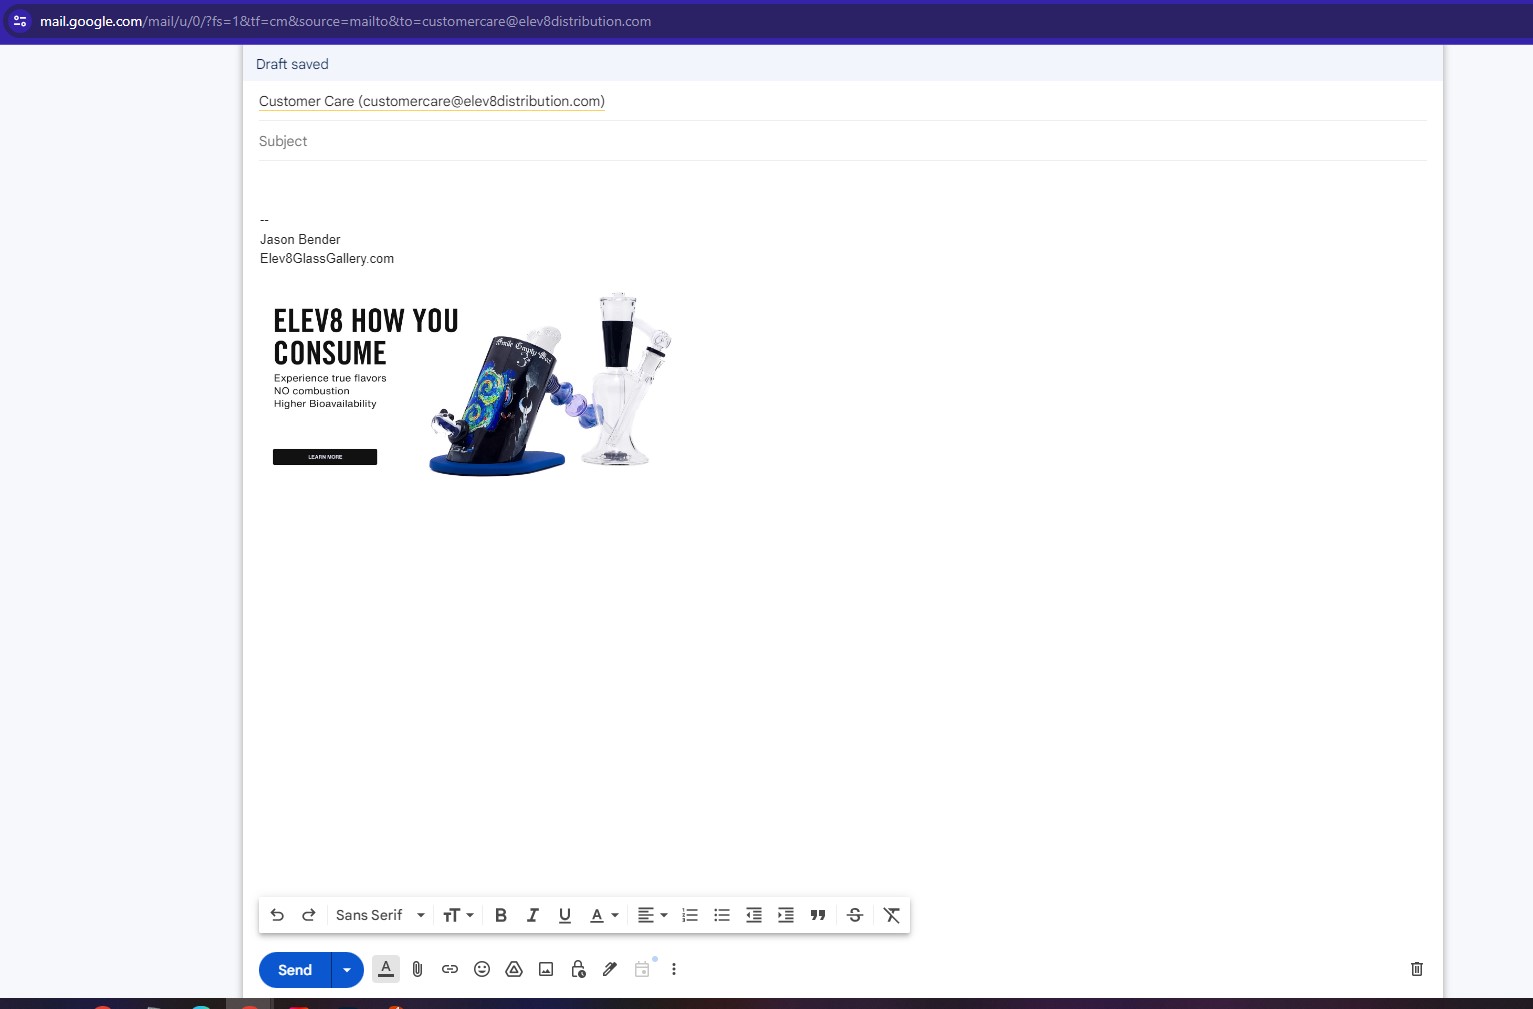
If done correctly, you should end up with a link that looks something like this:

And if you click the link you should be taken to something like this:

We have tried to make all of the replacement parts for our vaporizers available for sale on our website, but in reality there are some small parts for units like the SideKick which we do not offer for sale directly, usually because we do not have a stock of extras for that part. But, if you need a part and it’s not on our website, call us at 719-570-9928 and we can likely help you get a replacement for the part that you need!


